Tired of skipping lunch or settling for boring meals during your hectic workweek? This collection of 10 Quick & Delicious Lunch Recipes for Busy Weekdays is your ultimate solution! Each recipe is carefully crafted to save you time without compromising on flavor, nutrition, or satisfaction. Whether you’re working from home, packing a lunchbox, or need something ready in under 30 minutes, these recipes have got you covered. From fresh wraps and hearty salads to simple pasta dishes and protein-packed bowls, there’s something for every taste and lifestyle. Say goodbye to skipped lunches and unhealthy fast food — with these easy, wholesome ideas, you’ll look forward to lunchtime every single day!
1. Creamy Garlic Butter Chicken with Veggies
Prep Time: 15 minutes | Cook Time: 25 minutes | Total Time: 40 minutes
Servings: 4 | Calories: 420 per serving
Why You’ll Love This Recipe
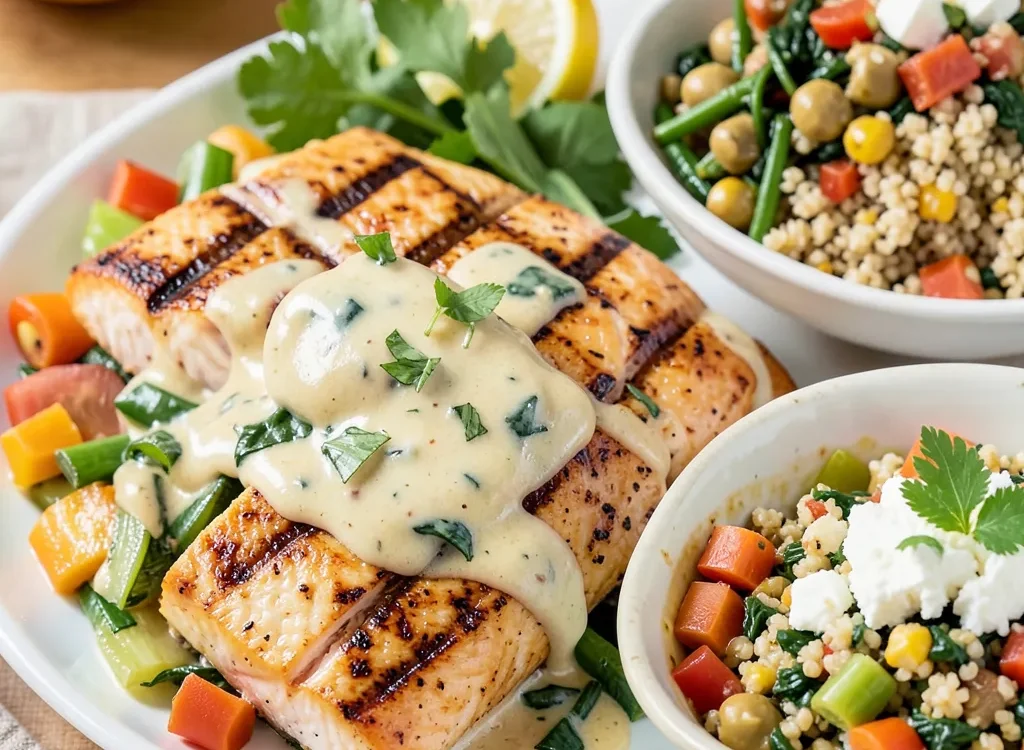
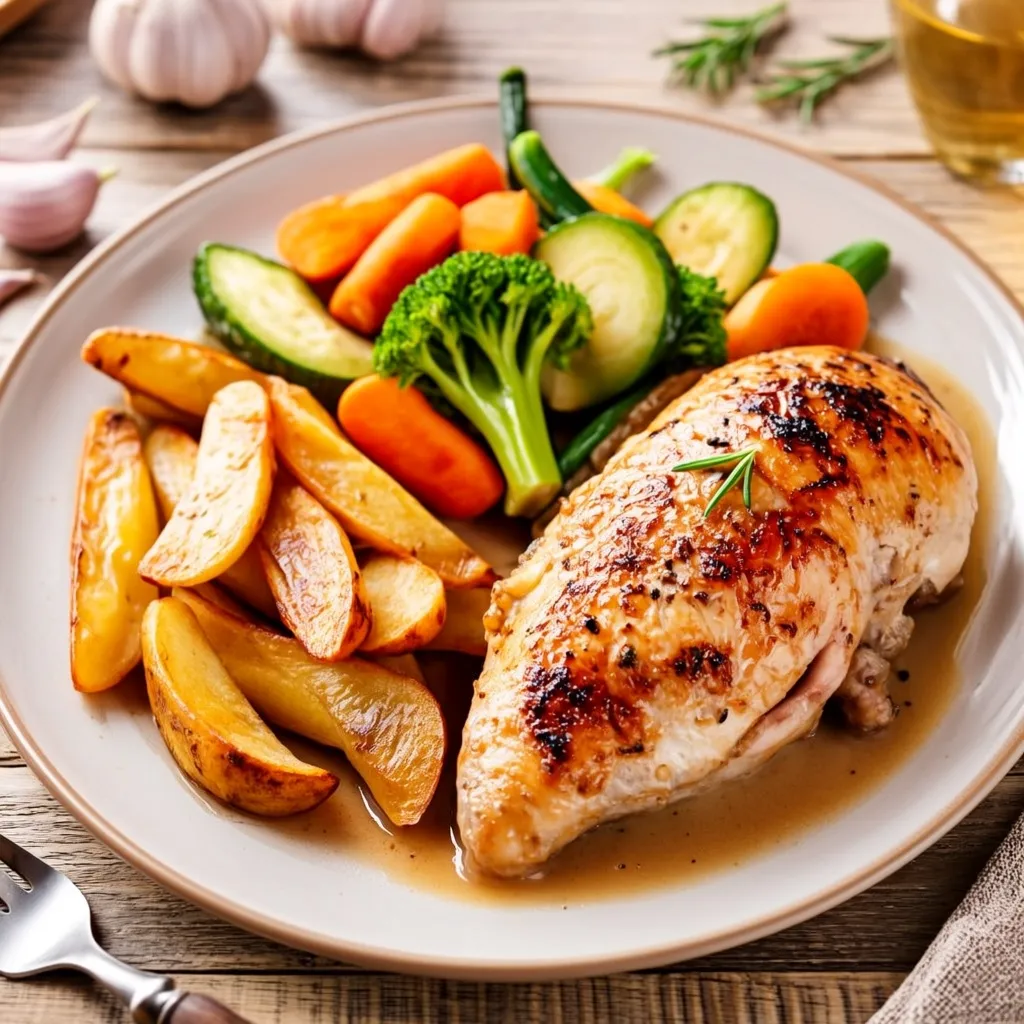
Creamy Garlic Butter Chicken with Veggies is the ultimate comfort food that brings together tender, juicy chicken breasts smothered in a rich, garlicky butter sauce loaded with colorful vegetables. This restaurant-quality dish is surprisingly easy to make at home in under 40 minutes. Whether you’re cooking for a busy weeknight dinner or a special weekend meal, this creamy garlic butter chicken never disappoints. The combination of aromatic garlic, melted butter, and a silky cream sauce makes every bite absolutely irresistible.
Ingredients
For the Chicken:
- 4 boneless, skinless chicken breasts (about 1.5 lbs)
- 1 teaspoon salt
- ½ teaspoon black pepper
- 1 teaspoon paprika
- ½ teaspoon garlic powder
- 2 tablespoons olive oil
For the Creamy Garlic Butter Sauce:
- 3 tablespoons unsalted butter
- 6 cloves garlic, minced
- 1 cup heavy cream
- ½ cup chicken broth
- ½ cup freshly grated Parmesan cheese
- 1 teaspoon Italian seasoning
- Salt and pepper to taste
For the Veggies:
- 1 cup broccoli florets
- 1 medium zucchini, sliced
- 1 red bell pepper, diced
- ½ cup cherry tomatoes, halved
- 1 cup baby spinach
Step-by-Step Instructions
Step 1: Season the Chicken
Pat the chicken breasts dry with paper towels. Season both sides generously with salt, black pepper, paprika, and garlic powder. Make sure the seasoning is evenly distributed for maximum flavor.
Step 2: Sear the Chicken
Heat olive oil in a large skillet over medium-high heat. Once the oil is shimmering, add the chicken breasts. Cook for 5-6 minutes per side until golden brown and the internal temperature reaches 165°F (74°C). Remove the chicken from the skillet and set it aside on a plate. Cover with foil to keep warm.
Step 3: Cook the Vegetables
In the same skillet, add 1 tablespoon of butter. Toss in the broccoli, zucchini, and red bell pepper. Sauté for 3-4 minutes until the veggies are tender-crisp. Remove and set aside.
Step 4: Make the Creamy Garlic Butter Sauce
Reduce the heat to medium. Add the remaining 2 tablespoons of butter to the skillet. Once melted, add the minced garlic and cook for about 30 seconds until fragrant — be careful not to burn it. Pour in the heavy cream and chicken broth. Stir well and bring to a gentle simmer. Add the Parmesan cheese and Italian seasoning. Whisk continuously until the sauce thickens, about 3-4 minutes. Season with salt and pepper to taste.
Step 5: Combine Everything
Return the seared chicken and sautéed vegetables to the skillet. Add the cherry tomatoes and baby spinach. Spoon the creamy sauce over everything. Let it simmer together for 2-3 minutes so all the flavors meld beautifully.
Step 6: Serve and Enjoy
Plate the creamy garlic butter chicken with veggies over steamed rice, mashed potatoes, or pasta. Garnish with extra Parmesan cheese and fresh parsley. Serve immediately while hot.
Pro Tips for the Best Results
- Don’t overcrowd the pan when searing chicken. This ensures a perfect golden crust.
- Use freshly minced garlic instead of pre-minced for the best aroma and flavor.
- Let the chicken rest for a few minutes after cooking to keep it juicy.
- Adjust the cream sauce thickness by simmering longer for a thicker sauce or adding a splash of broth for a thinner consistency.
Storage Instructions
Refrigerator: Store leftovers in an airtight container for up to 3-4 days.
Freezer: Freeze for up to 2 months. Thaw overnight in the refrigerator before reheating.
Reheating: Warm in a skillet over medium-low heat with a splash of cream to restore the sauce’s silky texture.
Nutritional Information (Per Serving)
| Nutrient | Amount |
|---|---|
| Calories | 420 |
| Protein | 38g |
| Carbohydrates | 10g |
| Fat | 26g |
| Fiber | 2g |
| Sodium | 580mg |
Frequently Asked Questions
Can I use chicken thighs instead of breasts?
Yes! Boneless, skinless chicken thighs work wonderfully and are even more tender and flavorful.
Can I make this dairy-free?
You can substitute the heavy cream with full-fat coconut cream and use nutritional yeast instead of Parmesan for a dairy-free version.
What vegetables can I substitute?
Feel free to use asparagus, mushrooms, snap peas, or any vegetables you prefer.
Is this recipe keto-friendly?
Yes, this recipe is naturally low in carbs and fits well into a keto diet when served without starchy sides.
2. One-Pot Cheesy Pasta Primavera
Prep Time: 10 minutes | Cook Time: 20 minutes | Total Time: 30 minutes
Servings: 6 | Calories: 380 per serving
Why You’ll Love This Recipe
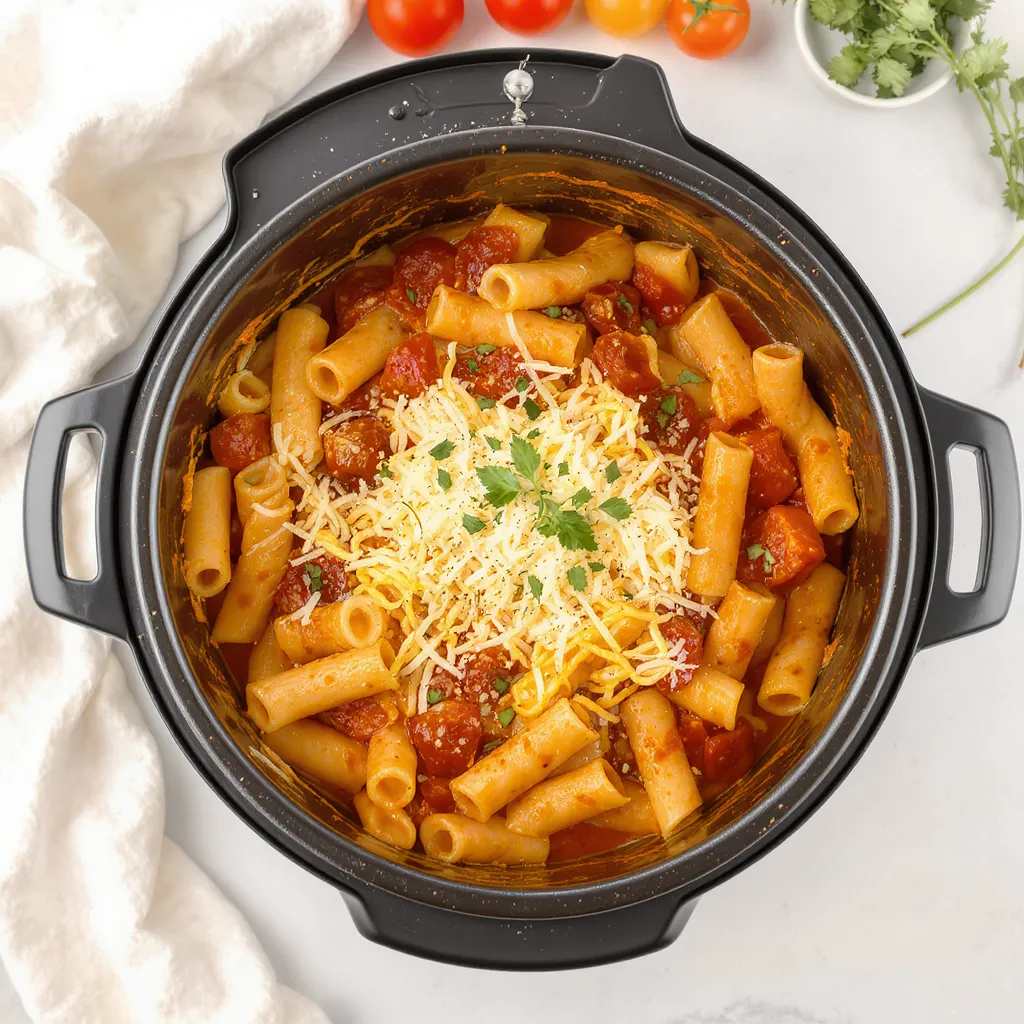
One-Pot Cheesy Pasta Primavera is the easiest and most delicious way to enjoy a veggie-loaded pasta dinner with minimal cleanup. Everything cooks together in a single pot — pasta, fresh seasonal vegetables, and a luscious cheesy sauce that coats every single noodle. This recipe is perfect for busy weeknights when you want something hearty, wholesome, and absolutely comforting. It’s a crowd-pleaser for both kids and adults, and you can customize it with whatever vegetables you have in your fridge.
Ingredients
For the Pasta:
- 1 lb (450g) penne pasta (or your favorite short pasta)
- 4 cups vegetable broth
- 1 cup water
For the Vegetables:
- 1 cup broccoli florets
- 1 medium zucchini, diced
- 1 red bell pepper, diced
- 1 yellow bell pepper, diced
- 1 cup cherry tomatoes, halved
- 1 cup fresh baby spinach
- ½ cup frozen peas
For the Cheesy Sauce:
- 2 tablespoons unsalted butter
- 3 cloves garlic, minced
- 1 cup heavy cream
- 1½ cups shredded mozzarella cheese
- ½ cup freshly grated Parmesan cheese
- 1 teaspoon Italian seasoning
- ½ teaspoon red pepper flakes (optional)
- Salt and black pepper to taste
Garnish:
- Fresh basil leaves
- Extra Parmesan cheese
Step-by-Step Instructions
Step 1: Sauté the Aromatics
Melt butter in a large, deep pot or Dutch oven over medium heat. Add the minced garlic and cook for 30 seconds until fragrant.
Step 2: Add Pasta and Liquid
Pour in the vegetable broth and water. Bring to a boil. Add the penne pasta and stir well to prevent sticking. Cook according to the package directions, stirring occasionally — usually about 10-12 minutes.
Step 3: Add the Vegetables
When the pasta has about 4 minutes of cooking time left, add the broccoli, zucchini, bell peppers, and frozen peas. Stir everything together and continue cooking until the pasta is al dente and the vegetables are tender-crisp.
Step 4: Make It Cheesy
Reduce the heat to low. Pour in the heavy cream and stir well. Add the shredded mozzarella and Parmesan cheese, Italian seasoning, and red pepper flakes. Stir continuously until the cheese is completely melted and the sauce is smooth and creamy.
Step 5: Add the Final Veggies
Toss in the cherry tomatoes and baby spinach. Stir gently until the spinach wilts. Season with salt and black pepper to taste.
Step 6: Serve and Enjoy
Divide the cheesy pasta primavera into bowls. Garnish with fresh basil leaves and an extra sprinkle of Parmesan cheese. Serve hot and enjoy every cheesy bite.
Pro Tips for the Best Results
- Don’t overcook the pasta. Since it continues to absorb liquid even off the heat, cook it just until al dente.
- Use freshly shredded cheese for the smoothest, creamiest sauce. Pre-shredded cheese contains anti-caking agents that can make the sauce grainy.
- Add vegetables in stages so that harder veggies cook through while softer ones stay vibrant.
- Adjust consistency by adding a splash of broth if the pasta thickens too much upon standing.
Storage Instructions
Refrigerator: Store in an airtight container for up to 3 days.
Freezer: Not recommended as the cream sauce may separate upon thawing.
Reheating: Reheat on the stove over low heat with a splash of milk or broth to restore creaminess.
Nutritional Information (Per Serving)
| Nutrient | Amount |
|---|---|
| Calories | 380 |
| Protein | 16g |
| Carbohydrates | 42g |
| Fat | 18g |
| Fiber | 4g |
| Sodium | 520mg |
Frequently Asked Questions
Can I use gluten-free pasta?
Absolutely! Any gluten-free penne or rotini works perfectly in this recipe.
Can I add protein to this dish?
Yes! Grilled chicken, shrimp, or Italian sausage are all great additions.
What other cheeses can I use?
Fontina, Gruyère, or cream cheese also create a delicious creamy sauce.
Can I make this vegan?
Use plant-based butter, dairy-free cream, and vegan cheese for a fully vegan version.
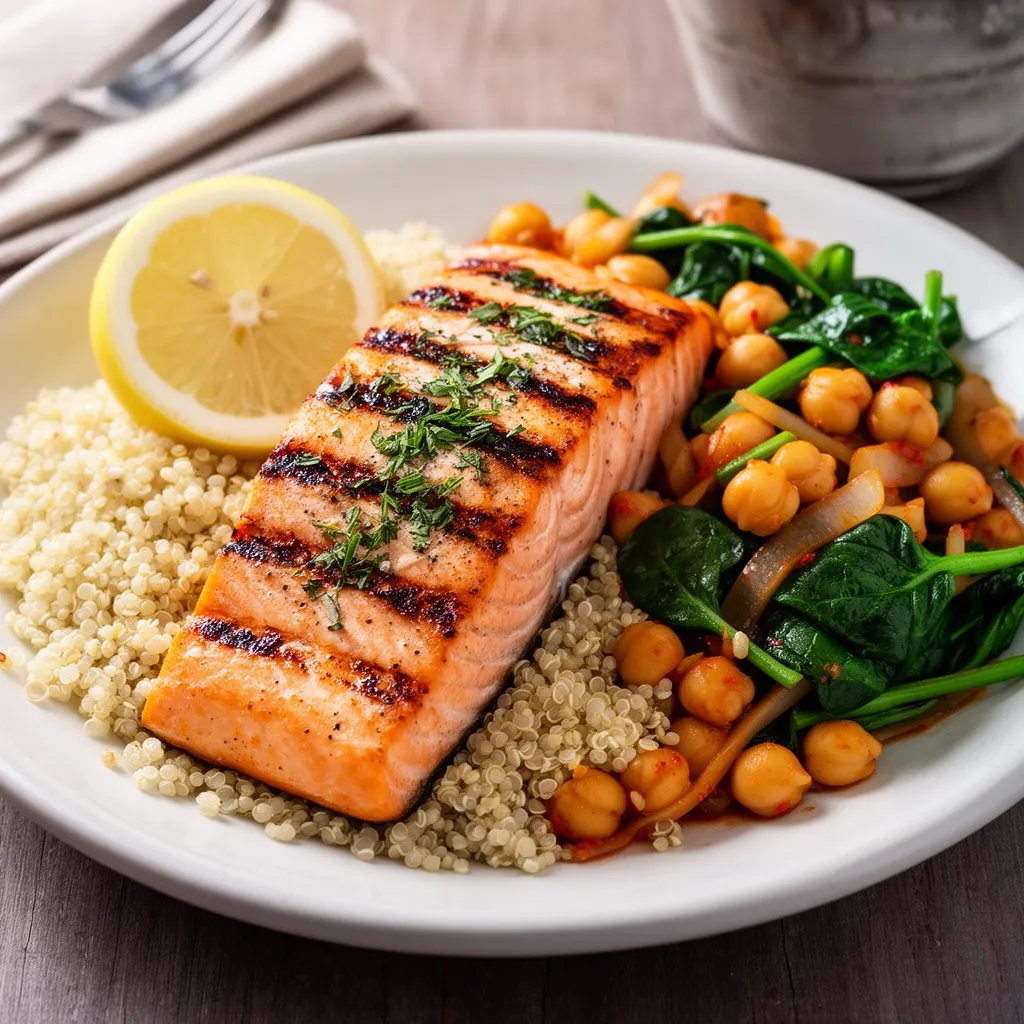
3. Grilled Lemon Herb Salmon with Quinoa
Prep Time: 15 minutes | Cook Time: 20 minutes | Total Time: 35 minutes
Servings: 4 | Calories: 450 per serving
Why You’ll Love This Recipe
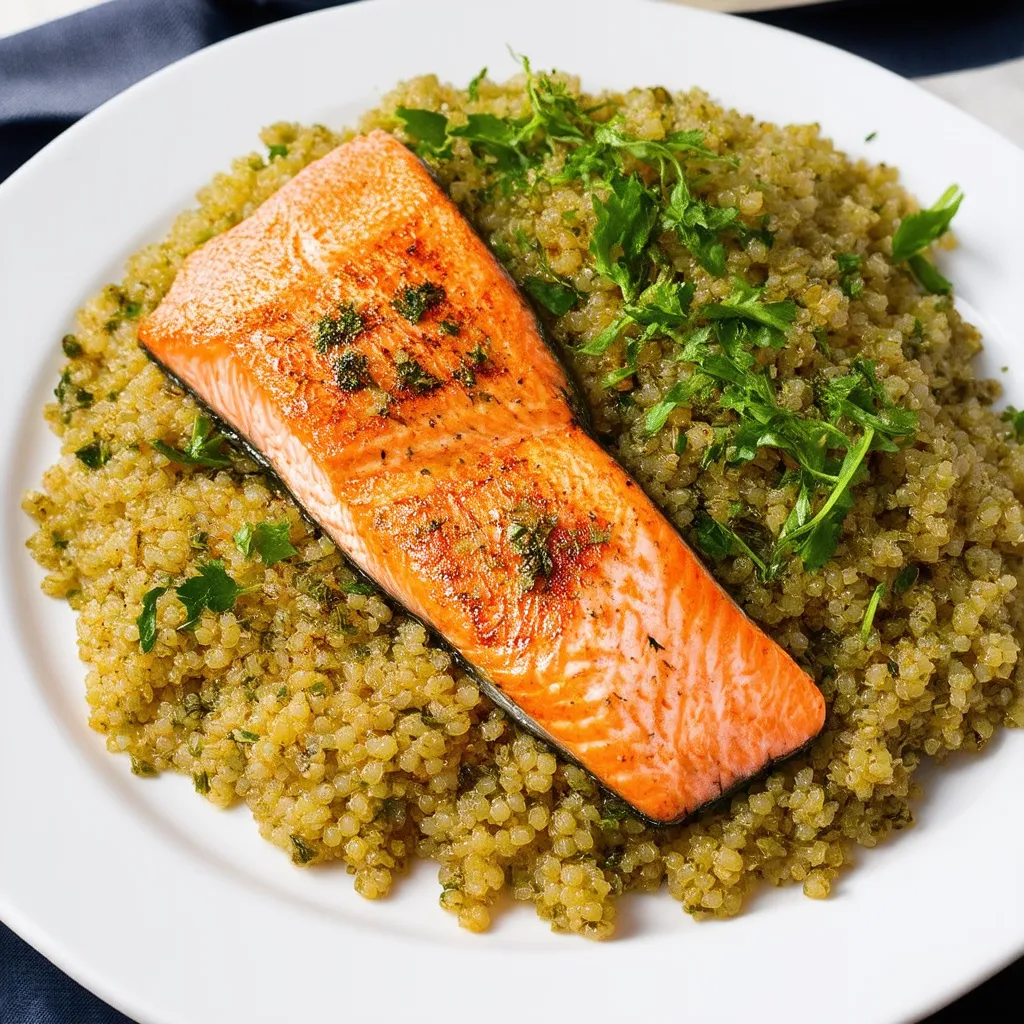
Grilled Lemon Herb Salmon with Quinoa is a healthy, flavorful, and elegant meal that comes together in just 35 minutes. The salmon fillets are marinated in a bright lemon herb mixture, then grilled to perfection with a beautiful char on the outside and a flaky, moist interior. Paired with fluffy, nutrient-packed quinoa, this dish is loaded with protein, omega-3 fatty acids, and essential vitamins. It’s the perfect recipe for anyone looking to eat clean without sacrificing flavor.
Ingredients
For the Lemon Herb Salmon:
- 4 salmon fillets (6 oz each, skin-on)
- 3 tablespoons olive oil
- 3 tablespoons fresh lemon juice
- 1 tablespoon lemon zest
- 3 cloves garlic, minced
- 1 tablespoon fresh dill, chopped
- 1 tablespoon fresh parsley, chopped
- 1 teaspoon dried oregano
- ½ teaspoon salt
- ¼ teaspoon black pepper
For the Quinoa:
- 1 cup quinoa, rinsed
- 2 cups water or vegetable broth
- 1 tablespoon olive oil
- 1 tablespoon lemon juice
- ¼ cup cucumber, diced
- ¼ cup cherry tomatoes, quartered
- 2 tablespoons fresh parsley, chopped
- Salt and pepper to taste
Garnish:
- Lemon slices
- Fresh dill sprigs
Step-by-Step Instructions
Step 1: Marinate the Salmon
In a small bowl, whisk together olive oil, lemon juice, lemon zest, minced garlic, dill, parsley, oregano, salt, and pepper. Place the salmon fillets in a shallow dish and pour the marinade over them. Coat each fillet evenly. Cover and refrigerate for at least 15 minutes (up to 2 hours for deeper flavor).
Step 2: Cook the Quinoa
While the salmon marinates, rinse the quinoa under cold water. In a medium saucepan, bring 2 cups of water or vegetable broth to a boil. Add the quinoa, reduce the heat to low, cover, and simmer for 15 minutes or until the liquid is absorbed. Fluff with a fork and set aside.
Step 3: Preheat the Grill
Preheat your grill or grill pan to medium-high heat. Lightly oil the grill grates to prevent sticking.
Step 4: Grill the Salmon
Place the salmon fillets skin-side down on the grill. Cook for 4-5 minutes per side, depending on thickness, until the internal temperature reaches 145°F (63°C). The salmon should flake easily with a fork and have beautiful grill marks.
Step 5: Prepare the Quinoa Salad
In a large bowl, combine the cooked quinoa with olive oil, lemon juice, cucumber, cherry tomatoes, and parsley. Toss gently and season with salt and pepper to taste.
Step 6: Plate and Serve
Spoon the lemon quinoa salad onto plates. Place the grilled salmon fillet on top. Garnish with fresh lemon slices and dill sprigs. Serve immediately.
Pro Tips for the Best Results
- Don’t move the salmon too early on the grill. Let it develop a nice crust before flipping.
- Use a meat thermometer to ensure perfectly cooked salmon at 145°F.
- Rinse the quinoa thoroughly before cooking to remove its natural bitter coating (saponin).
- Let the salmon rest for 2 minutes after grilling to allow the juices to redistribute.
Storage Instructions
Refrigerator: Store salmon and quinoa separately in airtight containers for up to 3 days.
Freezer: Cooked salmon can be frozen for up to 2 months. Quinoa freezes well for up to 3 months.
Reheating: Reheat salmon gently in the oven at 275°F for 10-15 minutes to avoid drying it out.
Nutritional Information (Per Serving)
| Nutrient | Amount |
|---|---|
| Calories | 450 |
| Protein | 40g |
| Carbohydrates | 28g |
| Fat | 20g |
| Fiber | 3g |
| Sodium | 420mg |
Frequently Asked Questions
Can I bake the salmon instead of grilling?
Yes! Bake at 400°F (200°C) for 12-15 minutes until cooked through.
Can I use frozen salmon?
Yes, just thaw it completely in the refrigerator overnight before marinating.
What can I substitute for quinoa?
Brown rice, couscous, or cauliflower rice are all great alternatives.
How do I know when the salmon is done?
The salmon should be opaque in the center and flake easily with a fork.
4. Spicy Chickpea & Spinach Stir-Fry
Prep Time: 10 minutes | Cook Time: 15 minutes | Total Time: 25 minutes
Servings: 4 | Calories: 280 per serving
Why You’ll Love This Recipe
Spicy Chickpea & Spinach Stir-Fry is a quick, healthy, and incredibly flavorful plant-based meal that’s ready in just 25 minutes. Protein-rich chickpeas are tossed with fresh spinach in a bold, spicy sauce that’s packed with warm spices and a hint of heat. This vegan-friendly dish is perfect for meal prep, a quick lunch, or a satisfying weeknight dinner. It’s naturally gluten-free, budget-friendly, and loaded with fiber, iron, and plant-based protein.
Ingredients
For the Stir-Fry:
- 2 cans (15 oz each) chickpeas, drained and rinsed
- 6 cups fresh baby spinach
- 1 medium onion, diced
- 4 cloves garlic, minced
- 1-inch piece fresh ginger, grated
- 1 medium tomato, diced
- 2 tablespoons olive oil
For the Spicy Sauce:
- 1 teaspoon cumin
- 1 teaspoon smoked paprika
- ½ teaspoon turmeric
- ½ teaspoon cayenne pepper (adjust to taste)
- 1 teaspoon garam masala
- 2 tablespoons soy sauce (or tamari for gluten-free)
- 1 tablespoon lemon juice
- Salt and black pepper to taste
Garnish:
- Fresh cilantro leaves
- Red pepper flakes
- Lemon wedges
Step-by-Step Instructions
Step 1: Prepare the Spice Mix
In a small bowl, combine cumin, smoked paprika, turmeric, cayenne pepper, and garam masala. Set aside.
Step 2: Sauté the Aromatics
Heat olive oil in a large skillet or wok over medium-high heat. Add the diced onion and cook for 3-4 minutes until softened and translucent. Add the minced garlic and grated ginger. Stir for 30 seconds until fragrant.
Step 3: Cook the Chickpeas
Add the drained chickpeas to the skillet. Sprinkle the spice mix over the chickpeas and stir well to coat them evenly. Cook for 5-6 minutes, stirring occasionally, until the chickpeas are slightly crispy on the outside and well-seasoned.
Step 4: Add Tomatoes and Sauce
Add the diced tomato, soy sauce, and lemon juice. Stir everything together and cook for 2 minutes, allowing the tomatoes to soften and the flavors to combine.
Step 5: Wilt the Spinach
Add the fresh baby spinach in batches, stirring continuously until it wilts down — this should take about 1-2 minutes. Season with salt and black pepper to taste.
Step 6: Serve and Enjoy
Transfer the spicy chickpea and spinach stir-fry to a serving dish. Garnish with fresh cilantro, red pepper flakes, and a squeeze of lemon. Serve over steamed rice, with warm naan bread, or enjoy on its own.
Pro Tips for the Best Results
- Pat the chickpeas dry after draining for extra crispiness in the pan.
- Adjust the heat level by increasing or decreasing the cayenne pepper to suit your spice tolerance.
- Add spinach at the very end to keep it bright green and tender, not mushy.
- Use canned chickpeas for convenience, or cook dried chickpeas for a firmer texture.
Storage Instructions
Refrigerator: Store in an airtight container for up to 4 days.
Freezer: Freeze for up to 2 months (spinach texture may change slightly upon thawing).
Reheating: Reheat in a skillet over medium heat or microwave for 2-3 minutes.
Nutritional Information (Per Serving)
| Nutrient | Amount |
|---|---|
| Calories | 280 |
| Protein | 14g |
| Carbohydrates | 36g |
| Fat | 9g |
| Fiber | 10g |
| Sodium | 480mg |
Frequently Asked Questions
Can I use frozen spinach?
Yes, but thaw and squeeze out excess water before adding it to the stir-fry.
Is this recipe vegan?
Yes! This dish is completely vegan and plant-based.
What can I serve this with?
It pairs perfectly with steamed basmati rice, quinoa, naan bread, or pita.
Can I add other vegetables?
Absolutely! Bell peppers, sweet potatoes, or kale are excellent additions.
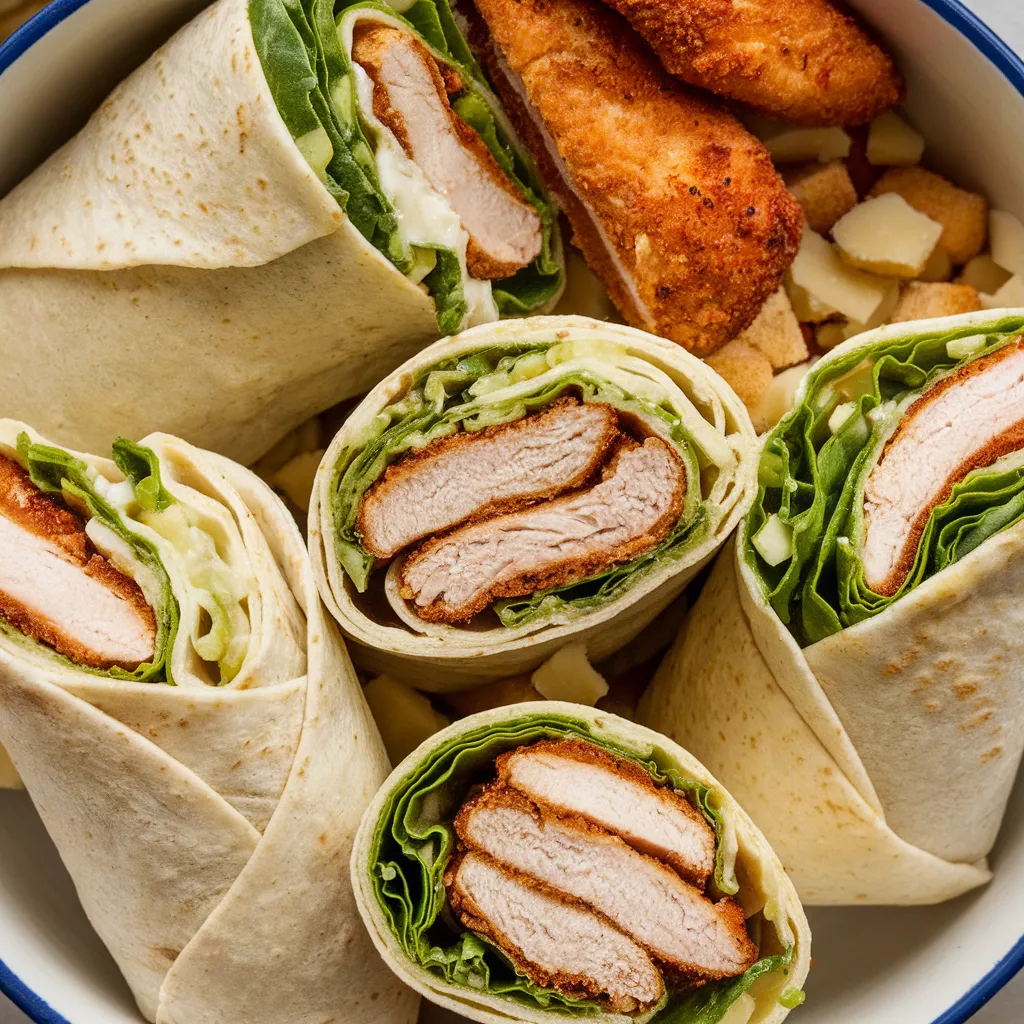
5. Classic Chicken Caesar Wraps
Prep Time: 15 minutes | Cook Time: 10 minutes | Total Time: 25 minutes
Servings: 4 | Calories: 390 per serving
Why You’ll Love This Recipe
Classic Chicken Caesar Wraps take all the beloved flavors of a traditional Caesar salad and wrap them up in a soft, flour tortilla for an easy, portable meal. Juicy seasoned chicken, crisp romaine lettuce, crunchy croutons, shaved Parmesan, and a tangy Caesar dressing come together in every single bite. These wraps are perfect for lunch, picnics, meal prep, or a quick grab-and-go dinner. They’re simple, satisfying, and always a hit with the whole family.
Ingredients
For the Chicken:
- 2 large boneless, skinless chicken breasts
- 1 tablespoon olive oil
- ½ teaspoon garlic powder
- ½ teaspoon onion powder
- ½ teaspoon smoked paprika
- Salt and pepper to taste
For the Wraps:
- 4 large flour tortillas (10-inch)
- 3 cups romaine lettuce, chopped
- ½ cup Caesar dressing (store-bought or homemade)
- ½ cup shaved Parmesan cheese
- ½ cup croutons, lightly crushed
- ¼ cup cherry tomatoes, halved (optional)
For Homemade Caesar Dressing (Optional):
- ¼ cup mayonnaise
- 2 tablespoons lemon juice
- 1 tablespoon Dijon mustard
- 2 cloves garlic, minced
- 2 tablespoons grated Parmesan cheese
- 1 teaspoon Worcestershire sauce
- Salt and pepper to taste
- 2-3 tablespoons olive oil
Step-by-Step Instructions
Step 1: Season and Cook the Chicken
Season the chicken breasts with garlic powder, onion powder, smoked paprika, salt, and pepper. Heat olive oil in a skillet over medium-high heat. Cook the chicken for 5-6 minutes per side until golden brown and cooked through (internal temperature of 165°F / 74°C). Let the chicken rest for 5 minutes, then slice into thin strips.
Step 2: Make the Caesar Dressing (If Homemade)
In a small bowl, whisk together mayonnaise, lemon juice, Dijon mustard, minced garlic, grated Parmesan, and Worcestershire sauce. Slowly drizzle in olive oil while whisking until smooth. Season with salt and pepper.
Step 3: Prepare the Filling
In a large bowl, toss the chopped romaine lettuce with Caesar dressing until well coated. Add the shaved Parmesan, crushed croutons, and cherry tomatoes. Toss gently.
Step 4: Assemble the Wraps
Lay each tortilla flat on a clean surface. Divide the dressed lettuce mixture evenly among the four tortillas. Top with sliced chicken strips.
Step 5: Roll the Wraps
Fold the bottom edge of the tortilla up over the filling. Fold in both sides, then roll tightly from bottom to top, keeping everything tucked in. Slice in half diagonally for serving.
Step 6: Serve and Enjoy
Serve the Classic Chicken Caesar Wraps immediately. Pair with chips, a side salad, or a bowl of soup for a complete meal.
Pro Tips for the Best Results
- Warm the tortillas briefly in a dry skillet or microwave for 10 seconds to make them more pliable and easier to roll.
- Slice the chicken thin for the best distribution of protein throughout the wrap.
- Add the croutons last so they stay crunchy.
- Wrap tightly using parchment paper or foil for a cleaner, easier eating experience.
Storage Instructions
Refrigerator: Wrap tightly in foil or plastic wrap and store for up to 24 hours. Add croutons fresh when serving to maintain crunch.
Freezer: Not recommended due to the fresh lettuce.
Meal Prep Tip: Store the chicken, dressing, and lettuce separately. Assemble wraps just before eating for the best texture.
Nutritional Information (Per Serving)
| Nutrient | Amount |
|---|---|
| Calories | 390 |
| Protein | 30g |
| Carbohydrates | 32g |
| Fat | 16g |
| Fiber | 2g |
| Sodium | 650mg |
Frequently Asked Questions
Can I use a different type of wrap?
Yes! Whole wheat tortillas, spinach wraps, or low-carb wraps all work great.
Can I use store-bought rotisserie chicken?
Absolutely! Shredded rotisserie chicken is a perfect shortcut.
How can I make this healthier?
Use a light Caesar dressing and opt for whole wheat tortillas.
Can I grill the chicken instead of pan-searing?
Yes, grilled chicken adds an amazing smoky flavor to these wraps.
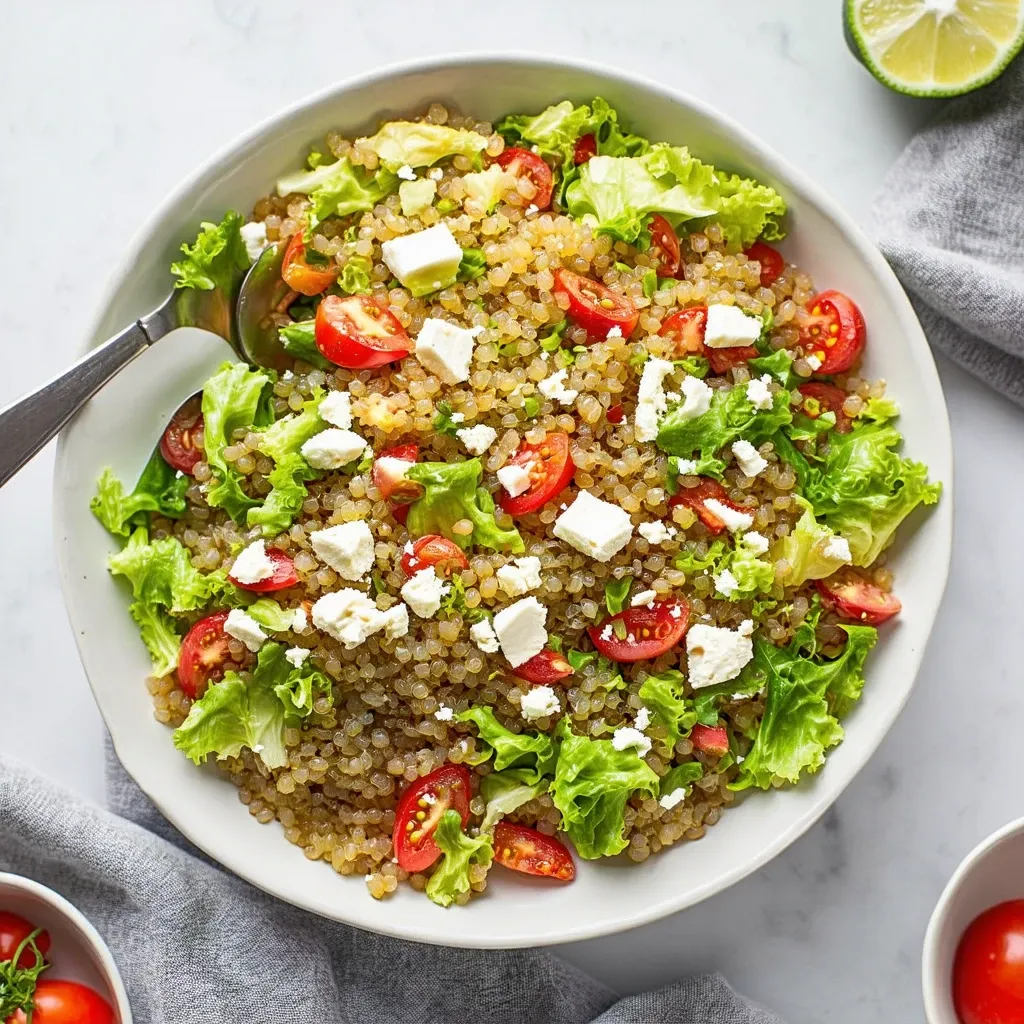
6. Mediterranean Quinoa Salad with Feta
Prep Time: 15 minutes | Cook Time: 15 minutes | Total Time: 30 minutes
Servings: 6 | Calories: 310 per serving
Why You’ll Love This Recipe
Mediterranean Quinoa Salad with Feta is a vibrant, refreshing, and nutrient-packed salad that celebrates the bold flavors of the Mediterranean. Fluffy quinoa is tossed with crisp cucumbers, juicy tomatoes, briny Kalamata olives, creamy feta cheese, and a zesty lemon herb vinaigrette. This salad is perfect as a light lunch, a side dish for grilled meats, or a wholesome meal-prep option that actually tastes better the next day. It’s naturally gluten-free, vegetarian, and bursting with fresh, clean flavors.
Ingredients
For the Salad:
- 1½ cups quinoa, rinsed
- 3 cups water
- 1 English cucumber, diced
- 1 cup cherry tomatoes, halved
- ½ cup Kalamata olives, sliced
- ½ medium red onion, finely diced
- 1 cup canned chickpeas, drained and rinsed
- ½ cup crumbled feta cheese
- ¼ cup sun-dried tomatoes, chopped
- ¼ cup fresh parsley, chopped
- 2 tablespoons fresh mint, chopped
For the Lemon Herb Vinaigrette:
- ¼ cup extra virgin olive oil
- 3 tablespoons fresh lemon juice
- 1 tablespoon red wine vinegar
- 1 clove garlic, minced
- 1 teaspoon dried oregano
- ½ teaspoon Dijon mustard
- Salt and black pepper to taste
Step-by-Step Instructions
Step 1: Cook the Quinoa
Rinse the quinoa under cold water to remove bitterness. In a medium saucepan, bring 3 cups of water to a boil. Add the quinoa, reduce heat to low, cover, and simmer for 15 minutes until the water is absorbed and the quinoa is fluffy. Fluff with a fork and spread on a baking sheet to cool quickly.
Step 2: Prepare the Vinaigrette
In a small jar or bowl, combine olive oil, lemon juice, red wine vinegar, minced garlic, oregano, and Dijon mustard. Whisk vigorously (or shake the jar) until well combined. Season with salt and pepper.
Step 3: Chop the Vegetables
While the quinoa cools, dice the cucumber, halve the cherry tomatoes, slice the olives, dice the red onion, and chop the sun-dried tomatoes, parsley, and mint.
Step 4: Combine the Salad
In a large mixing bowl, add the cooled quinoa and all prepared vegetables. Pour the lemon herb vinaigrette over the salad and toss everything together until well combined.
Step 5: Add the Feta and Herbs
Gently fold in the crumbled feta cheese, fresh parsley, and mint. Be careful not to over-mix so the feta stays in nice chunks.
Step 6: Serve and Enjoy
Serve the Mediterranean quinoa salad at room temperature or chilled. It’s perfect on its own, stuffed in a pita, or served alongside grilled chicken or fish.
Pro Tips for the Best Results
- Cool the quinoa completely before mixing with the other ingredients to prevent a mushy salad.
- Make it ahead of time. This salad tastes even better after sitting in the fridge for a few hours as the flavors meld.
- Use quality feta cheese — block feta crumbled by hand has a creamier, richer taste than pre-crumbled feta.
- Add the dressing gradually and toss well. You can always add more, but you can’t take it away.
Storage Instructions
Refrigerator: Store in an airtight container for up to 5 days — one of the best meal-prep salads.
Freezer: Not recommended due to the fresh vegetables and feta.
Tip: If meal prepping, store the dressing separately and add it just before eating for the freshest taste.
Nutritional Information (Per Serving)
| Nutrient | Amount |
|---|---|
| Calories | 310 |
| Protein | 11g |
| Carbohydrates | 34g |
| Fat | 15g |
| Fiber | 5g |
| Sodium | 440mg |
Frequently Asked Questions
Can I use couscous instead of quinoa?
Yes! Pearl couscous or regular couscous works well as a substitute.
How can I make this vegan?
Simply omit the feta or use a dairy-free feta alternative.
Can I add protein?
Grilled chicken, shrimp, or canned tuna are all excellent additions for extra protein.
What if I don’t like olives?
You can leave them out or substitute with capers or artichoke hearts.
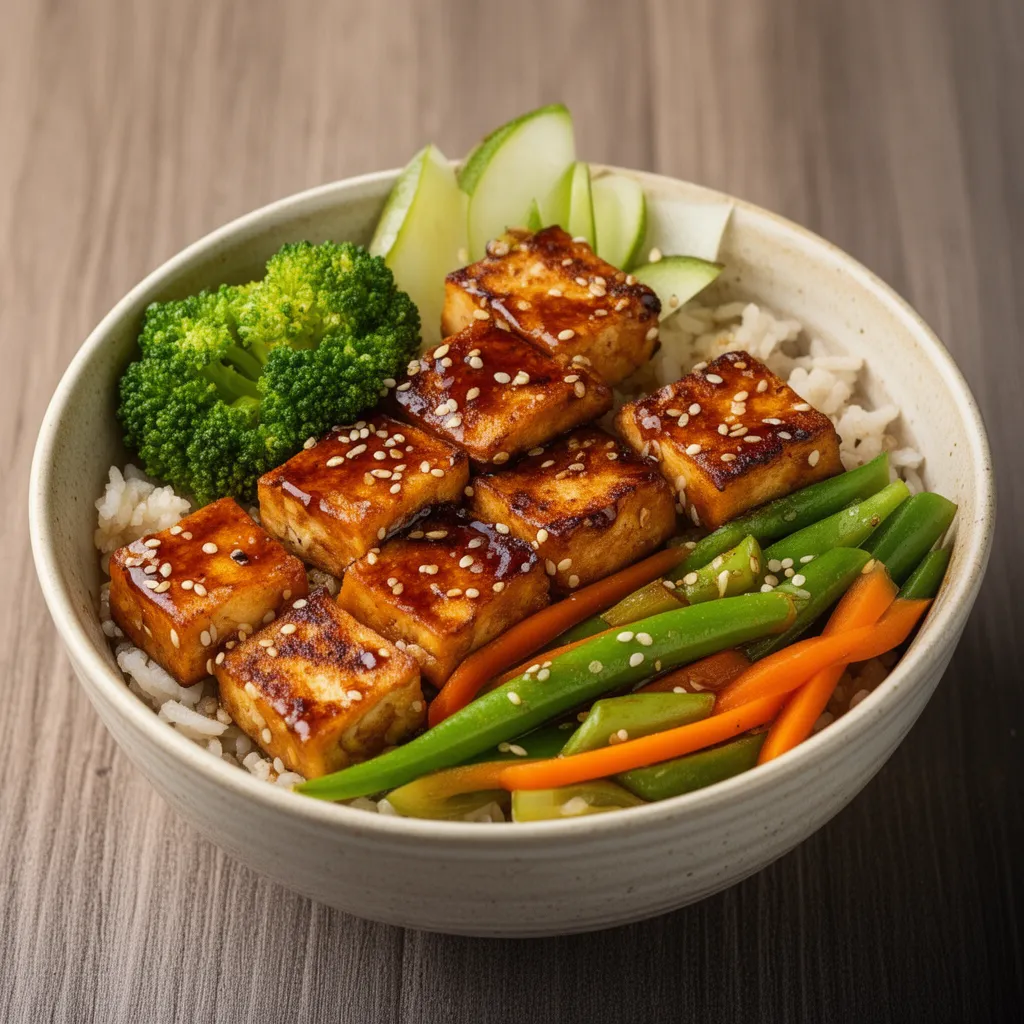
7. Teriyaki Tofu & Vegetable Bowl
Prep Time: 15 minutes | Cook Time: 20 minutes | Total Time: 35 minutes
Servings: 4 | Calories: 350 per serving
Why You’ll Love This Recipe
Teriyaki Tofu & Vegetable Bowl is a wholesome, colorful, and incredibly satisfying plant-based meal that delivers big, bold Asian-inspired flavors. Crispy pan-fried tofu is glazed in a sweet and savory homemade teriyaki sauce, served over steamed rice with a rainbow of stir-fried vegetables. This bowl is perfect for vegans, vegetarians, or anyone looking to add more plant-based meals to their weekly rotation. It’s better than takeout, ready in 35 minutes, and completely customizable.
Ingredients
For the Crispy Tofu:
- 1 block (14 oz) extra-firm tofu, pressed and cubed
- 2 tablespoons cornstarch
- 1 tablespoon vegetable oil
- Pinch of salt
For the Homemade Teriyaki Sauce:
- ¼ cup soy sauce (or tamari for gluten-free)
- 2 tablespoons rice vinegar
- 2 tablespoons maple syrup or honey
- 1 tablespoon sesame oil
- 1 clove garlic, minced
- 1 teaspoon fresh ginger, grated
- 1 tablespoon cornstarch mixed with 2 tablespoons water (slurry)
For the Vegetables:
- 1 cup broccoli florets
- 1 red bell pepper, sliced
- 1 large carrot, julienned
- 1 cup snap peas
- ½ cup edamame, shelled
For the Bowl:
- 2 cups cooked jasmine or brown rice
- 1 tablespoon sesame seeds
- 2 green onions, sliced
- Sriracha (optional)
Step-by-Step Instructions
Step 1: Press and Prepare the Tofu
Press the tofu for at least 15 minutes to remove excess moisture (use a tofu press or wrap in paper towels with a heavy object on top). Cut into ¾-inch cubes and toss with cornstarch and a pinch of salt until evenly coated.
Step 2: Crisp the Tofu
Heat vegetable oil in a large non-stick skillet or wok over medium-high heat. Add the tofu cubes in a single layer. Cook for 2-3 minutes per side until golden and crispy on all sides — about 8-10 minutes total. Remove from the pan and set aside.
Step 3: Make the Teriyaki Sauce
In a small saucepan, combine soy sauce, rice vinegar, maple syrup, sesame oil, garlic, and ginger. Bring to a simmer over medium heat. Stir in the cornstarch slurry and cook for 1-2 minutes until the sauce thickens. Remove from heat.
Step 4: Stir-Fry the Vegetables
Using the same skillet, add a little more oil if needed. Stir-fry the broccoli, bell pepper, carrot, and snap peas over high heat for 3-4 minutes until tender-crisp. Add the edamame and cook for 1 more minute.
Step 5: Combine Everything
Return the crispy tofu to the skillet with the vegetables. Pour the teriyaki sauce over everything and toss gently until the tofu and veggies are evenly coated.
Step 6: Assemble the Bowls
Divide the cooked rice among four bowls. Top with the teriyaki tofu and vegetables. Garnish with sesame seeds, sliced green onions, and a drizzle of sriracha if you like it spicy.
Pro Tips for the Best Results
- Press the tofu well — the drier the tofu, the crispier it gets.
- Don’t move the tofu too often in the pan. Let each side get a proper golden crust before flipping.
- Make the teriyaki sauce from scratch for the freshest, most balanced flavor — it takes only 5 minutes.
- Use high heat for stir-frying the vegetables to keep them vibrant and crisp.
Storage Instructions
Refrigerator: Store tofu, veggies, sauce, and rice separately for up to 4 days.
Freezer: Cooked teriyaki tofu can be frozen for up to 1 month. Rice freezes well for up to 3 months.
Reheating: Reheat in a skillet to re-crisp the tofu, or microwave for a quick option.
Nutritional Information (Per Serving)
| Nutrient | Amount |
|---|---|
| Calories | 350 |
| Protein | 18g |
| Carbohydrates | 44g |
| Fat | 12g |
| Fiber | 5g |
| Sodium | 620mg |
Frequently Asked Questions
Can I use baked tofu instead?
Yes! Bake at 400°F for 25 minutes for an even crispier texture.
Can I substitute chicken for tofu?
Absolutely — diced chicken breast works perfectly with this teriyaki sauce.
Is this recipe gluten-free?
Use tamari instead of soy sauce and ensure all other ingredients are gluten-free.
What other vegetables can I use?
Mushrooms, bok choy, zucchini, or baby corn are all great choices.
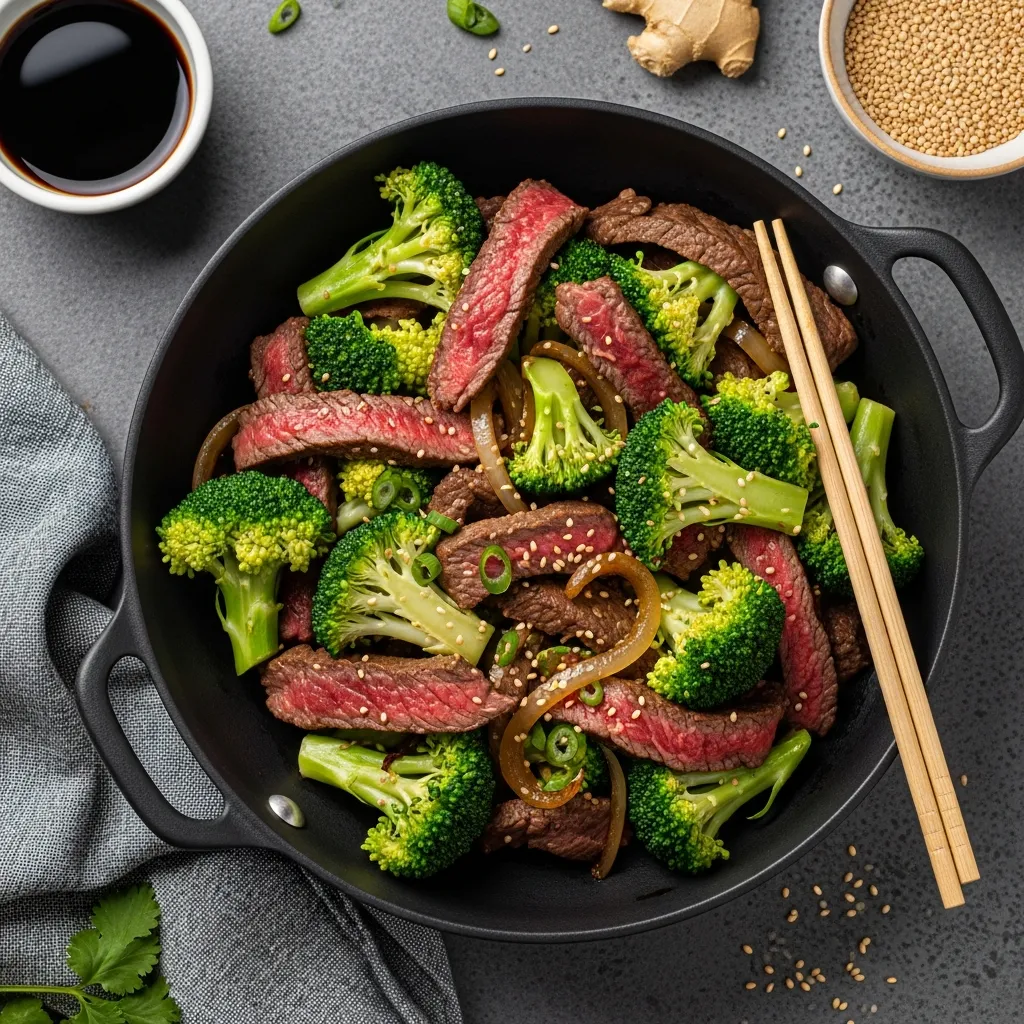
8. Quick Beef & Broccoli Stir-Fry
Prep Time: 10 minutes | Cook Time: 15 minutes | Total Time: 25 minutes
Servings: 4 | Calories: 380 per serving
Why You’ll Love This Recipe
Quick Beef & Broccoli Stir-Fry is a classic Chinese-American takeout favorite that you can easily make at home in under 25 minutes. Tender slices of beef are wok-seared to perfection and tossed with crisp-tender broccoli florets in a rich, savory garlic-ginger sauce. This homemade version is fresher, healthier, and more flavorful than anything you’d order from a restaurant. It’s a family-friendly recipe that pairs perfectly with steamed white rice or lo mein noodles.
Ingredients
For the Beef:
- 1 lb flank steak or sirloin, thinly sliced against the grain
- 1 tablespoon soy sauce
- 1 tablespoon cornstarch
- 1 tablespoon vegetable oil
For the Stir-Fry Sauce:
- ¼ cup soy sauce
- 2 tablespoons oyster sauce
- 1 tablespoon rice vinegar
- 1 tablespoon brown sugar
- 1 tablespoon sesame oil
- 1 tablespoon cornstarch mixed with 2 tablespoons water (slurry)
For the Stir-Fry:
- 4 cups broccoli florets
- 3 cloves garlic, minced
- 1-inch piece fresh ginger, minced
- 2 tablespoons vegetable oil
- ¼ cup beef broth or water
- Red pepper flakes (optional)
Garnish:
- Sesame seeds
- Sliced green onions
Step-by-Step Instructions
Step 1: Marinate the Beef
Slice the flank steak thinly against the grain for maximum tenderness. In a bowl, toss the beef slices with 1 tablespoon soy sauce, cornstarch, and vegetable oil. Mix well and let it marinate for at least 10 minutes.
Step 2: Make the Stir-Fry Sauce
In a small bowl, whisk together soy sauce, oyster sauce, rice vinegar, brown sugar, and sesame oil. Set aside. Prepare the cornstarch slurry separately.
Step 3: Sear the Beef
Heat 1 tablespoon of vegetable oil in a large wok or skillet over high heat until smoking. Add the beef in a single layer and sear for 1-2 minutes per side until browned. Do not overcook — the beef should still be slightly pink inside at this stage. Remove and set aside.
Step 4: Cook the Broccoli
In the same wok, add the remaining tablespoon of oil. Add the broccoli florets and stir-fry for 2 minutes. Add the beef broth, cover, and steam for 2-3 minutes until the broccoli is bright green and tender-crisp.
Step 5: Build the Sauce
Push the broccoli to the side of the wok. Add the garlic and ginger to the center and cook for 30 seconds until fragrant. Pour in the stir-fry sauce and the cornstarch slurry. Stir everything together and cook until the sauce thickens and becomes glossy, about 1-2 minutes.
Step 6: Combine and Serve
Return the seared beef to the wok. Toss everything together until the beef and broccoli are evenly coated in the thick, savory sauce. Garnish with sesame seeds and sliced green onions. Serve immediately over steamed rice.
Pro Tips for the Best Results
- Slice the beef against the grain and as thinly as possible for the most tender results. Partially freezing the steak for 20 minutes makes slicing easier.
- Get the wok screaming hot before adding the beef. High heat is the secret to a proper stir-fry sear.
- Don’t overcook the beef. It continues cooking when added back to the sauce.
- Blanch the broccoli beforehand if you prefer a softer texture.
Storage Instructions
Refrigerator: Store in an airtight container for up to 3 days.
Freezer: Freeze for up to 2 months. Thaw in the refrigerator overnight before reheating.
Reheating: Reheat in a wok or skillet over high heat for the best texture. Avoid the microwave if possible.
Nutritional Information (Per Serving)
| Nutrient | Amount |
|---|---|
| Calories | 380 |
| Protein | 30g |
| Carbohydrates | 16g |
| Fat | 22g |
| Fiber | 3g |
| Sodium | 780mg |
Frequently Asked Questions
Can I use a different cut of beef?
Yes! Sirloin, skirt steak, or even ribeye work well. The key is slicing thin against the grain.
Can I make this with chicken?
Absolutely. Sliced chicken breast or thigh meat is a great substitute.
Is this recipe gluten-free?
Use tamari instead of soy sauce and gluten-free oyster sauce for a gluten-free version.
How can I make this spicier?
Add 1-2 teaspoons of chili garlic sauce or sriracha to the stir-fry sauce.
9. Creamy Tomato Basil Soup with Grilled Cheese

Prep Time: 10 minutes | Cook Time: 25 minutes | Total Time: 35 minutes
Servings: 4 | Calories: 480 per serving (soup + grilled cheese)
Why You’ll Love This Recipe
Creamy Tomato Basil Soup with Grilled Cheese is the ultimate comfort food pairing that never goes out of style. This velvety, rich tomato soup is made from scratch with San Marzano tomatoes, fresh basil, and a touch of cream — it’s miles ahead of anything from a can. Paired with a perfectly golden, buttery, and melty grilled cheese sandwich, this combination is pure comfort in every spoonful and every bite. It’s ideal for chilly evenings, rainy days, or whenever you need a warm hug in a bowl.
Ingredients
For the Creamy Tomato Basil Soup:
- 2 tablespoons unsalted butter
- 1 tablespoon olive oil
- 1 medium onion, diced
- 3 cloves garlic, minced
- 2 cans (28 oz each) San Marzano whole peeled tomatoes
- 1 cup vegetable or chicken broth
- ½ cup heavy cream
- ¼ cup fresh basil leaves, plus extra for garnish
- 1 teaspoon sugar (to balance acidity)
- 1 teaspoon salt
- ½ teaspoon black pepper
- ½ teaspoon Italian seasoning
For the Classic Grilled Cheese:
- 8 slices thick-cut white or sourdough bread
- 4 tablespoons unsalted butter, softened
- 8 slices sharp cheddar cheese (or a mix of cheddar and Gruyère)
- 1 tablespoon mayonnaise (optional, for extra crispy bread)
Step-by-Step Instructions
Step 1: Sauté the Aromatics
In a large pot, heat butter and olive oil over medium heat. Add the diced onion and cook for 4-5 minutes until soft and translucent. Add the minced garlic and cook for 30 seconds until fragrant.
Step 2: Add the Tomatoes
Pour in both cans of San Marzano tomatoes with their juices. Use a spoon to break apart the whole tomatoes. Add the vegetable broth, sugar, salt, pepper, and Italian seasoning. Stir well and bring to a boil.
Step 3: Simmer the Soup
Reduce the heat to low and let the soup simmer for 15 minutes, stirring occasionally. This allows the flavors to deepen and meld together beautifully.
Step 4: Blend Until Smooth
Remove the pot from heat. Using an immersion blender, blend the soup directly in the pot until completely smooth and silky. Alternatively, carefully transfer the soup in batches to a countertop blender.
Step 5: Add Cream and Basil
Return the pot to low heat. Stir in the heavy cream and fresh basil leaves. Simmer for another 2-3 minutes. Taste and adjust seasoning as needed.
Step 6: Make the Grilled Cheese
While the soup simmers, butter one side of each bread slice (or spread with a thin layer of mayonnaise for extra crunch). Place 2 slices of cheese between two slices of bread with the buttered sides facing out. Cook in a skillet over medium-low heat for 3-4 minutes per side until the bread is deeply golden and the cheese is perfectly melted.
Step 7: Serve and Enjoy
Ladle the creamy tomato basil soup into bowls. Garnish with a swirl of cream, fresh basil leaves, and a crack of black pepper. Slice the grilled cheese diagonally and serve alongside the soup for dipping.
Pro Tips for the Best Results
- Use San Marzano tomatoes for the best flavor — they’re sweeter and less acidic than regular canned tomatoes.
- Add the sugar if the soup tastes too acidic. It balances the tomato flavor beautifully.
- Low and slow for grilled cheese. Medium-low heat ensures the cheese melts completely before the bread burns.
- Spread mayo on the outside of the bread instead of butter for the crispiest, most golden grilled cheese you’ve ever had.
Storage Instructions
Soup Refrigerator: Store in an airtight container for up to 5 days.
Soup Freezer: Freeze (without the cream) for up to 3 months. Add cream when reheating.
Grilled Cheese: Best enjoyed fresh. Leftover sandwiches can be re-crisped in a skillet.
Reheating Soup: Warm on the stove over medium-low heat, stirring occasionally.
Nutritional Information (Per Serving — Soup + Grilled Cheese)
| Nutrient | Amount |
|---|---|
| Calories | 480 |
| Protein | 16g |
| Carbohydrates | 38g |
| Fat | 30g |
| Fiber | 4g |
| Sodium | 920mg |
Frequently Asked Questions
Can I make this soup without cream?
Yes! Substitute with coconut cream for a dairy-free option or simply omit for a lighter version.
Can I use fresh tomatoes?
Yes — use about 3 lbs of ripe Roma tomatoes. Roast them at 400°F for 20 minutes before adding to the pot for extra depth.
What’s the best bread for grilled cheese?
Sourdough and thick-cut white bread both work wonderfully. Brioche is also a delicious option.
Can I add other ingredients to the soup?
Roasted red peppers, a touch of smoked paprika, or a splash of balsamic vinegar add wonderful depth.
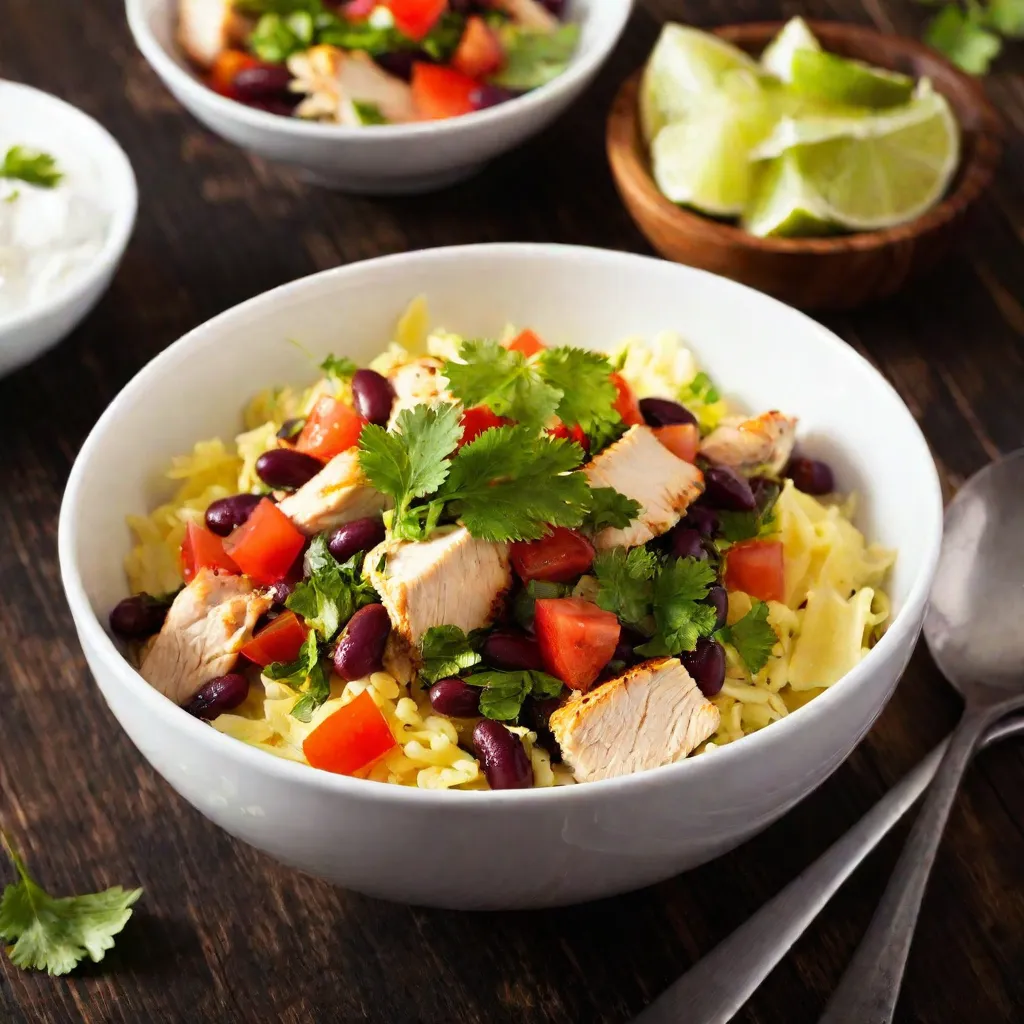
10. Southwest Chicken & Black Bean Burrito Bowl
Prep Time: 15 minutes | Cook Time: 20 minutes | Total Time: 35 minutes
Servings: 4 | Calories: 520 per serving
Why You’ll Love This Recipe
Southwest Chicken & Black Bean Burrito Bowl is a hearty, vibrant, and flavor-packed meal that brings the best of Tex-Mex cuisine straight to your kitchen. Seasoned chicken, seasoned black beans, cilantro-lime rice, fresh veggies, and all your favorite toppings come together in one big, beautiful bowl. This recipe is perfect for meal prep, feeding a crowd, or satisfying those Chipotle cravings at home. It’s fully customizable, incredibly filling, and ready in just 35 minutes.
Ingredients
For the Southwest Chicken:
- 1.5 lbs boneless, skinless chicken breasts
- 1 tablespoon olive oil
- 1 teaspoon chili powder
- 1 teaspoon cumin
- ½ teaspoon smoked paprika
- ½ teaspoon garlic powder
- ½ teaspoon onion powder
- ¼ teaspoon cayenne pepper
- Salt and pepper to taste
- Juice of 1 lime
For the Cilantro-Lime Rice:
- 1½ cups long-grain white rice
- 3 cups water
- Juice of 1 lime
- ¼ cup fresh cilantro, chopped
- 1 tablespoon butter
- Pinch of salt
For the Seasoned Black Beans:
- 1 can (15 oz) black beans, drained and rinsed
- ½ teaspoon cumin
- ¼ teaspoon garlic powder
- Salt to taste
- Splash of lime juice
For the Bowl Toppings:
- 1 cup corn kernels (fresh, canned, or frozen)
- 1 cup pico de gallo or fresh salsa
- 1 ripe avocado, sliced
- ½ cup shredded Mexican cheese blend
- ¼ cup sour cream
- Pickled jalapeños
- Fresh cilantro
- Lime wedges
Step-by-Step Instructions
Step 1: Season and Cook the Chicken
In a small bowl, mix together chili powder, cumin, smoked paprika, garlic powder, onion powder, cayenne pepper, salt, and pepper. Rub the seasoning generously over the chicken breasts. Heat olive oil in a large skillet over medium-high heat. Cook the chicken for 6-7 minutes per side until cooked through (165°F / 74°C internal temperature). Squeeze lime juice over the chicken. Let it rest for 5 minutes, then slice or dice.
Step 2: Cook the Cilantro-Lime Rice
While the chicken cooks, bring 3 cups of water and a pinch of salt to a boil. Add the rice, reduce heat to low, cover, and cook for 15-18 minutes until the water is absorbed. Remove from heat and let it sit covered for 5 minutes. Fluff with a fork, then stir in butter, lime juice, and chopped cilantro.
Step 3: Heat the Black Beans
In a small saucepan over medium heat, combine the drained black beans with cumin, garlic powder, salt, and a splash of lime juice. Cook for 3-4 minutes until warmed through and lightly seasoned.
Step 4: Prepare the Toppings
While everything cooks, prepare your toppings — slice the avocado, warm the corn, prepare pico de gallo, and chop fresh cilantro.
Step 5: Assemble the Burrito Bowls
Start with a generous scoop of cilantro-lime rice as the base. Add the seasoned black beans, sliced southwest chicken, corn, and pico de gallo. Top with sliced avocado, shredded cheese, a dollop of sour cream, pickled jalapeños, and fresh cilantro. Finish with a squeeze of lime.
Step 6: Serve and Enjoy
Serve the Southwest Chicken & Black Bean Burrito Bowls immediately while everything is warm and fresh. Customize each bowl with your favorite toppings and dig in!
Pro Tips for the Best Results
- Pound the chicken to an even thickness before cooking for uniform doneness.
- Let the chicken rest after cooking — this keeps it juicy when sliced.
- Toast the corn in a dry skillet for 3-4 minutes to add a smoky, charred flavor.
- Double the recipe for meal prep — these bowls hold up beautifully for 4-5 days in the fridge.
Storage Instructions
Refrigerator: Store components separately in airtight containers for up to 5 days. Keep avocado and sour cream separate and add fresh.
Freezer: Cooked chicken and rice can be frozen for up to 3 months. Black beans freeze well for up to 2 months.
Reheating: Reheat chicken and rice in the microwave or on the stove. Add cold toppings fresh.
Nutritional Information (Per Serving)
| Nutrient | Amount |
|---|---|
| Calories | 520 |
| Protein | 42g |
| Carbohydrates | 54g |
| Fat | 16g |
| Fiber | 10g |
| Sodium | 680mg |
Frequently Asked Questions
Can I use chicken thighs instead of breasts?
Yes! Boneless skinless chicken thighs are juicier and work perfectly with these seasonings.
Can I make this vegetarian?
Absolutely — swap the chicken for extra black beans, seasoned tofu, or sofritas-style crumbled tofu.
What rice can I use instead of white rice?
Brown rice, cauliflower rice, or quinoa are all excellent alternatives.
How do I prevent the avocado from browning?
Slice it fresh just before serving or squeeze lime juice over it to slow oxidation.
Can I use a different protein?
Shrimp, steak, ground turkey, or carnitas are all fantastic options for this burrito bowl.


