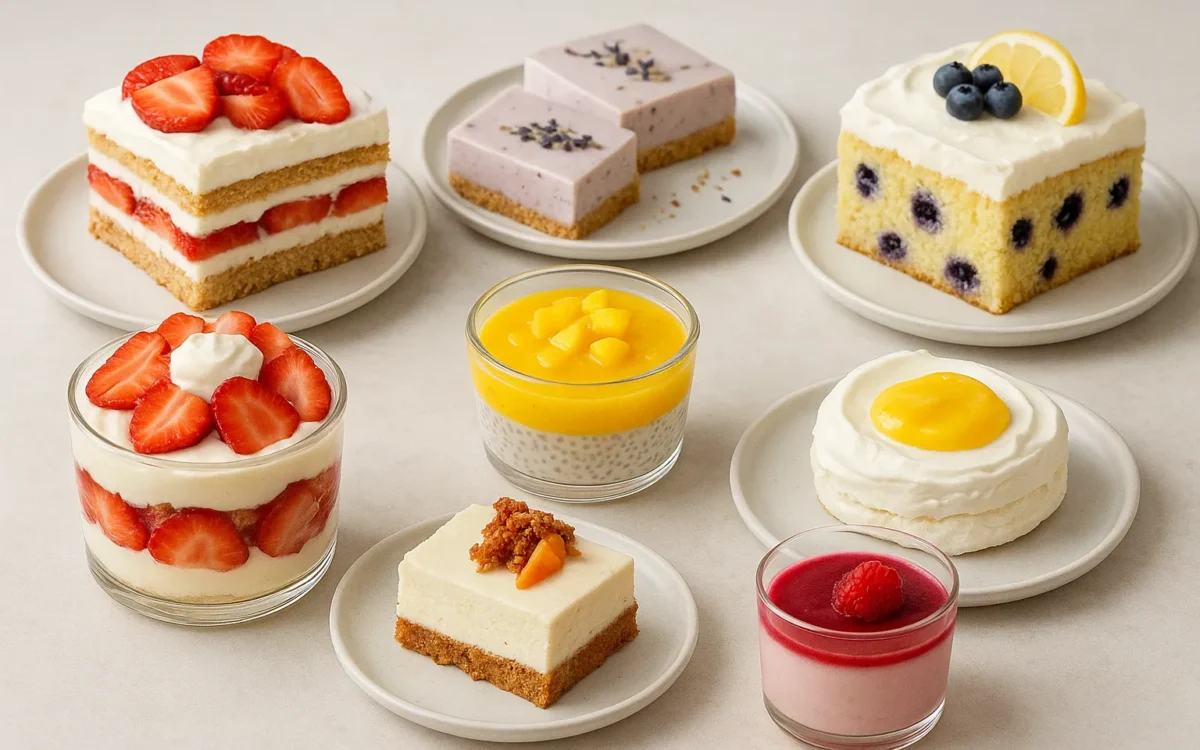
As the season shifts and flowers begin to bloom, spring brings with it a fresh craving for light, fruity, and colorful desserts — and the internet is absolutely obsessed right now! From no-bake strawberry cheesecake jars to dreamy lemon blueberry tarts, these 8 easy spring dessert recipes are taking social media by storm. Whether you’re a beginner in the kitchen or a seasoned home baker, these crowd-pleasing treats are simple to make, require minimal ingredients, and look stunning on any table. Get ready to impress your family and friends with desserts that taste as good as they look — because spring has never been this delicious!
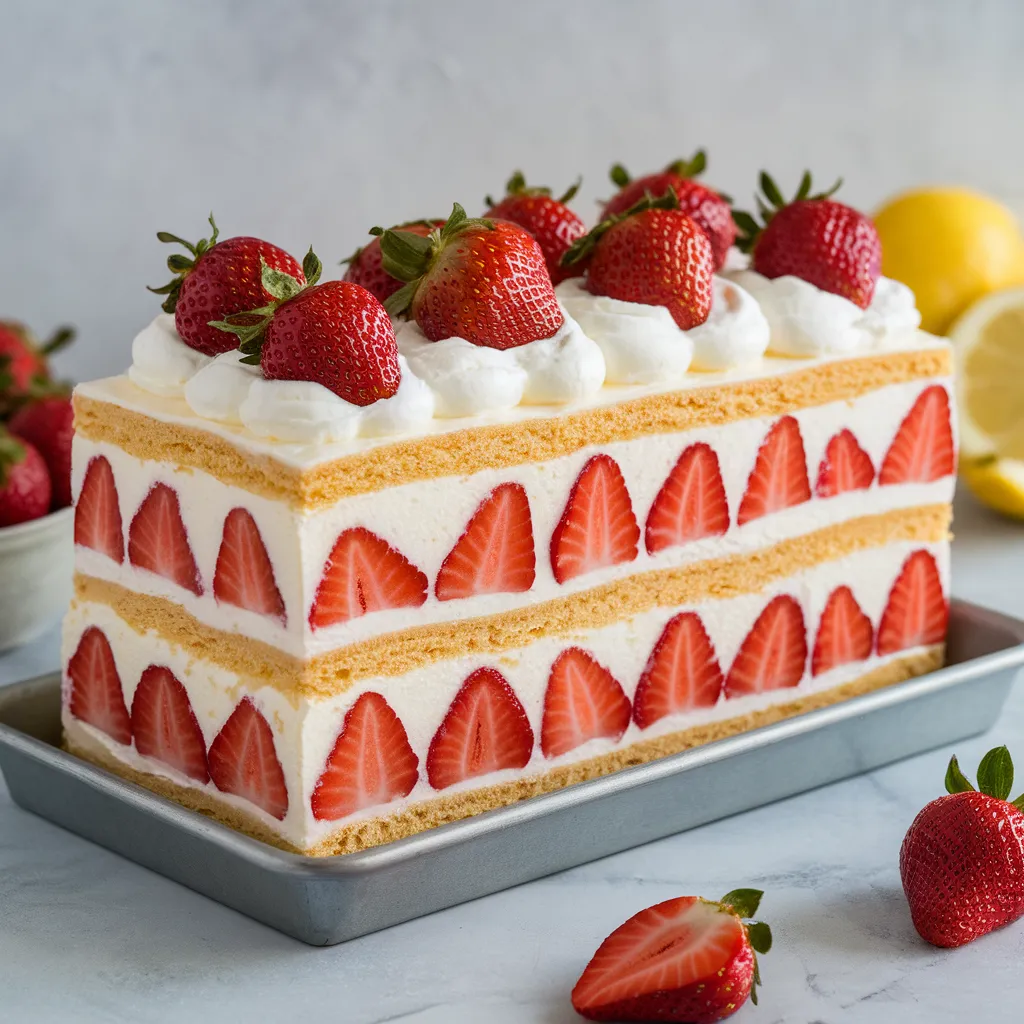
1. Strawberry Lemon Icebox Cake
Prep Time: 20 minutes | Chill Time: 6–8 hours (overnight best) | Servings: 10–12 | Difficulty: Easy
What is Strawberry Lemon Icebox Cake?
Strawberry Lemon Icebox Cake is a no-bake, layered dessert that combines the bright, tangy flavor of lemon with the sweet juiciness of fresh strawberries. Made with layers of crispy graham crackers that soften into a cake-like texture as it chills, this dessert is the perfect make-ahead treat for summer gatherings, potlucks, and family dinners. No oven required — just layer, chill, and serve!
Ingredients
For the Lemon Cream Layer:
- 2 cups heavy whipping cream (cold)
- 8 oz cream cheese (softened)
- ½ cup powdered sugar
- 3 tablespoons fresh lemon juice
- 1 tablespoon lemon zest
- 1 teaspoon pure vanilla extract
For the Layers:
- 2 sleeves graham crackers (about 24–26 crackers)
- 2 cups fresh strawberries, thinly sliced
For the Topping:
- 1 cup fresh strawberries, sliced
- Extra lemon zest for garnish
- Optional: fresh mint leaves
Instructions
Step 1 — Make the Lemon Cream
In a large mixing bowl, beat the softened cream cheese with an electric mixer until smooth and fluffy, about 2 minutes. Add powdered sugar, fresh lemon juice, lemon zest, and vanilla extract. Mix until fully combined and creamy.
Step 2 — Whip the Cream
In a separate chilled bowl, whip the cold heavy cream until stiff peaks form. Gently fold the whipped cream into the cream cheese mixture using a rubber spatula. Do not overmix — you want it light and airy.
Step 3 — Layer the Cake
Spread a thin layer of lemon cream on the bottom of a 9×13 inch baking dish. Arrange a single layer of graham crackers over the cream, breaking them as needed to fill gaps. Spread a generous layer of lemon cream over the crackers, then add a layer of sliced strawberries. Repeat this process — crackers, cream, strawberries — until you have 3–4 full layers, finishing with a layer of cream on top.
Step 4 — Chill
Cover the dish tightly with plastic wrap and refrigerate for at least 6–8 hours, or overnight for best results. The crackers will absorb the cream and become soft and cake-like.
Step 5 — Garnish and Serve
Before serving, top with fresh sliced strawberries and a sprinkle of lemon zest. Slice into squares and serve cold directly from the dish.
Tips & Tricks
- Make it ahead: This cake actually tastes better the next day, making it perfect for meal prep and entertaining.
- Use cold heavy cream for best whipping results.
- Add a thin layer of lemon curd between layers for an extra punch of lemon flavor.
- Storage: Cover and store in the refrigerator for up to 3 days.
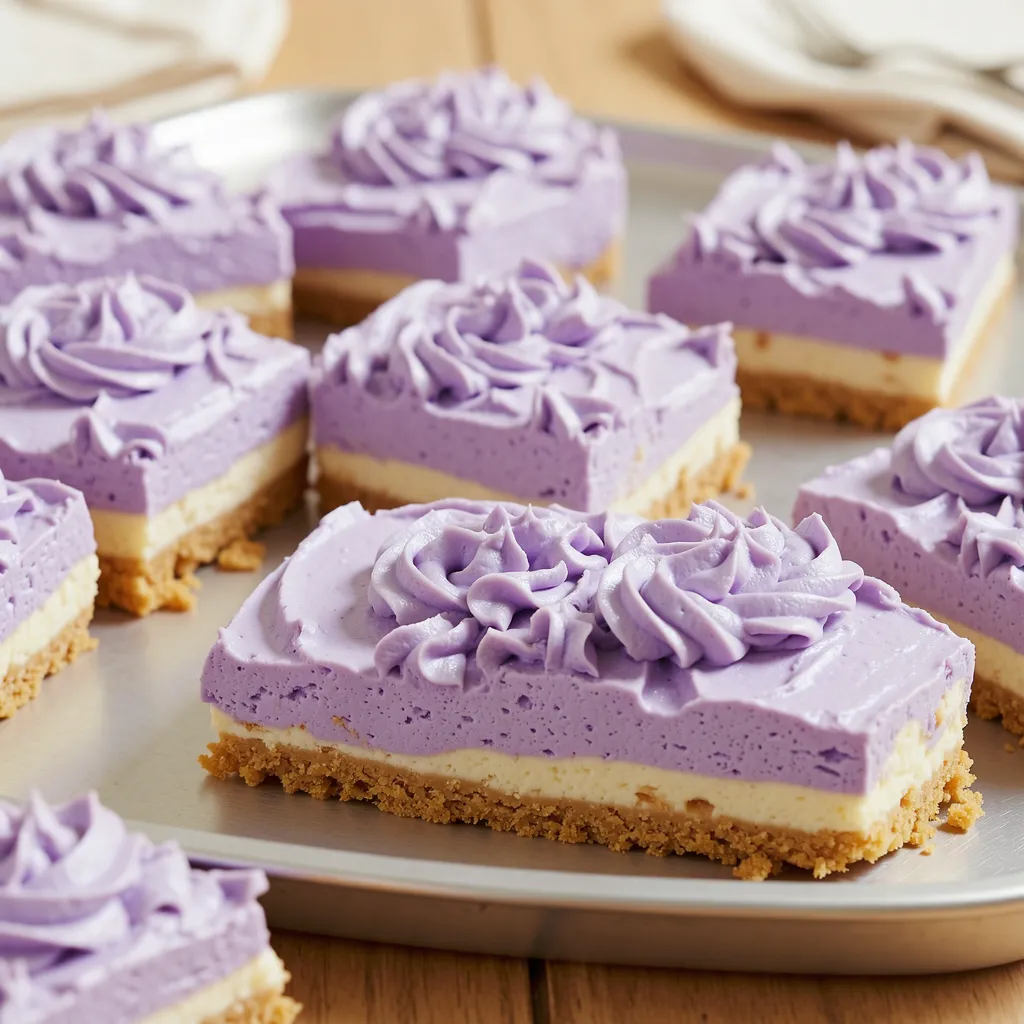
2. Lavender Honey Cheesecake Bars
Prep Time: 25 minutes | Bake Time: 35–40 minutes | Chill Time: 4 hours | Servings: 16 bars | Difficulty: Medium
What are Lavender Honey Cheesecake Bars?
Lavender Honey Cheesecake Bars are elegant, floral-flavored dessert bars with a buttery graham cracker crust and a silky smooth cheesecake filling infused with fragrant culinary lavender and golden honey. These beautiful bars are sophisticated enough for a dinner party yet simple enough to bake at home on a weekend. The subtle floral notes of lavender paired with the natural sweetness of honey create a dessert experience that feels truly special.
Ingredients
For the Graham Cracker Crust:
- 1½ cups graham cracker crumbs (about 12 full crackers)
- ¼ cup granulated sugar
- 6 tablespoons unsalted butter, melted
- Pinch of salt
For the Lavender Honey Cheesecake Filling:
- 16 oz (2 blocks) cream cheese, fully softened to room temperature
- ½ cup honey (good quality, raw honey preferred)
- 2 large eggs, room temperature
- ¼ cup sour cream
- 1 tablespoon dried culinary lavender, finely ground
- 1 teaspoon pure vanilla extract
- 2 tablespoons all-purpose flour
- Pinch of salt
For the Topping:
- 2 tablespoons honey, for drizzling
- Dried lavender buds, for garnish
- Optional: fresh edible flowers
Instructions
Step 1 — Preheat & Prep
Preheat your oven to 325°F (163°C). Line an 8×8 or 9×9 inch baking pan with parchment paper, leaving overhang on the sides so you can easily lift the bars out later. Lightly grease the parchment.
Step 2 — Make the Crust
In a medium bowl, mix together graham cracker crumbs, sugar, melted butter, and a pinch of salt until the mixture resembles wet sand. Press this mixture firmly and evenly into the bottom of the prepared pan using the back of a spoon or a flat-bottomed glass. Bake the crust for 10 minutes, then remove and let it cool slightly.
Step 3 — Infuse the Lavender
If your dried culinary lavender is coarsely ground, pulse it in a spice grinder or crush it with a mortar and pestle until fine. This releases the oils and ensures the floral flavor infuses evenly throughout the filling.
Step 4 — Make the Cheesecake Filling
In a large bowl, beat the softened cream cheese with an electric mixer on medium speed until completely smooth, about 3 minutes — no lumps. Add the honey and mix until incorporated. Add the eggs one at a time, mixing on low speed after each addition. Stir in the sour cream, ground lavender, vanilla extract, flour, and salt. Mix just until combined — do not overbeat.
Step 5 — Bake
Pour the filling over the pre-baked crust and smooth the top with a spatula. Bake for 35–40 minutes, or until the edges are set and the center has a very slight jiggle. Turn off the oven and let the bars cool inside the oven with the door cracked open for 30 minutes — this prevents cracking.
Step 6 — Chill and Serve
Remove from the oven, let cool to room temperature, then refrigerate for at least 4 hours or overnight. Once fully chilled, lift out of the pan using the parchment overhang. Cut into 16 even bars with a sharp knife, wiping the blade clean between each cut. Drizzle with honey and garnish with dried lavender buds before serving.
Tips & Tricks
- Use culinary-grade lavender only — decorative lavender may be treated with chemicals not safe for eating.
- Room temperature ingredients are key to a smooth, crack-free cheesecake.
- Do not overbake — the center should still wobble slightly when you remove it from the oven.
- Storage: Store in an airtight container in the refrigerator for up to 5 days. These bars also freeze beautifully for up to 1 month.
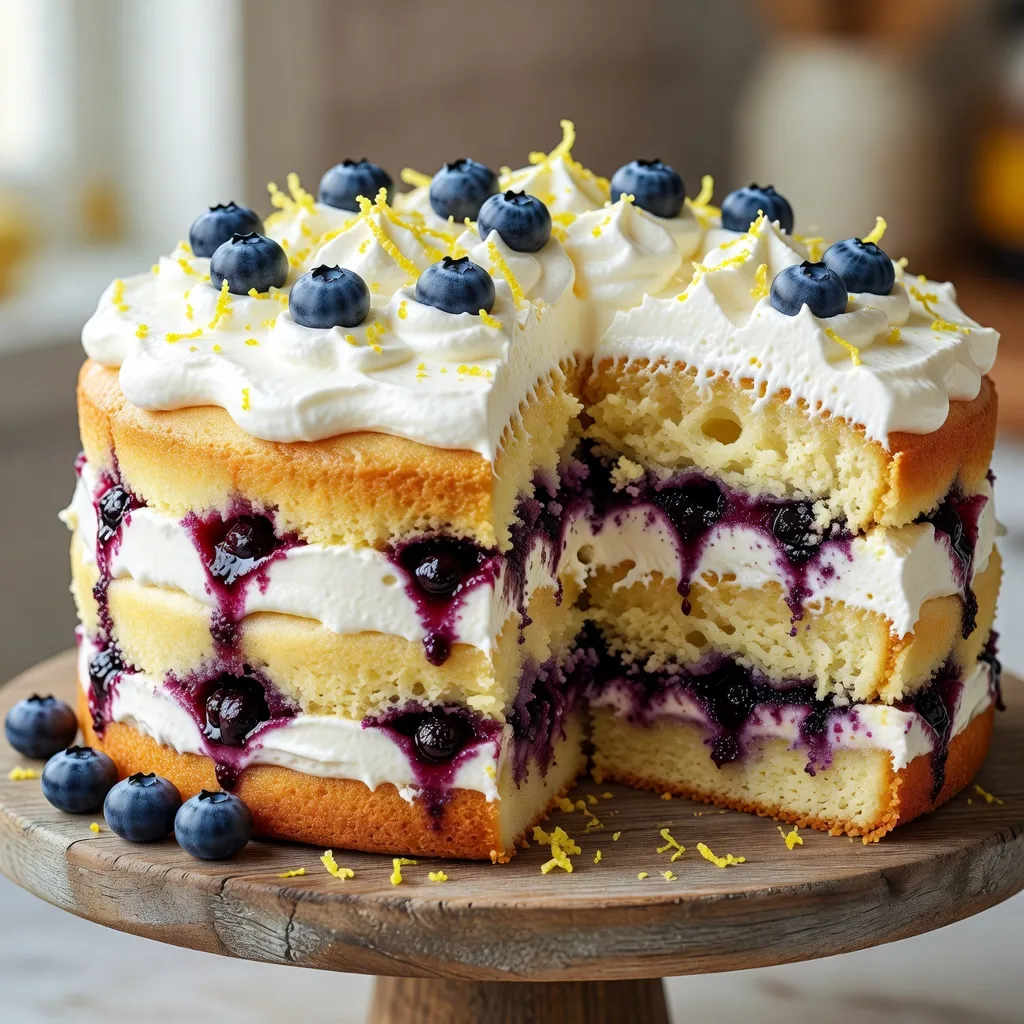
3. Lemon Blueberry Poke Cake
Prep Time: 15 minutes | Bake Time: 30–35 minutes | Chill Time: 1 hour | Servings: 12–15 | Difficulty: Easy
What is Lemon Blueberry Poke Cake?
Lemon Blueberry Poke Cake is a soft, moist sheet cake soaked in a luscious lemon glaze that seeps into every hole, making each bite incredibly flavorful and tender. Topped with a fluffy whipped cream frosting and studded with fresh blueberries, this cake is a crowd-pleaser that is as beautiful as it is delicious. It is one of the most popular summer cake recipes because it comes together quickly, feeds a large crowd, and gets even better as it sits.
Ingredients
For the Lemon Cake:
- 1 box (15.25 oz) white or lemon cake mix
- 3 large eggs
- 1 cup water
- ⅓ cup vegetable oil
- 2 tablespoons fresh lemon juice
- 1 tablespoon lemon zest
For the Lemon Soak:
- 1 can (14 oz) sweetened condensed milk
- ¼ cup fresh lemon juice
- 2 teaspoons lemon zest
For the Whipped Cream Frosting:
- 2 cups heavy whipping cream (cold)
- ½ cup powdered sugar
- 1 teaspoon vanilla extract
- 4 oz cream cheese (softened) — optional, for stability
For the Topping:
- 1½ cups fresh blueberries
- Lemon slices or lemon zest curls
- Optional: blueberry jam for drizzle
Instructions
Step 1 — Bake the Cake
Preheat your oven to 350°F (177°C). Grease a 9×13 inch baking pan. In a large bowl, prepare the cake mix according to package directions, adding the eggs, water, and oil. Mix in the fresh lemon juice and lemon zest for an extra bright flavor. Pour the batter into the prepared pan and bake for 30–35 minutes, or until a toothpick inserted in the center comes out clean.
Step 2 — Poke the Cake
Remove the cake from the oven and let it cool for 10 minutes — not fully, just slightly. Using the handle of a wooden spoon or a thick skewer, poke holes all over the cake, spacing them about 1 inch apart. The more holes, the more the lemon soak will seep through and flavor the cake.
Step 3 — Add the Lemon Soak
In a bowl, whisk together the sweetened condensed milk, fresh lemon juice, and lemon zest. Pour this mixture slowly and evenly over the warm cake, making sure it fills all the holes. Spread it across the surface with a spoon to ensure even coverage. Let the cake cool completely, then refrigerate for at least 1 hour so the soak absorbs fully.
Step 4 — Make the Whipped Cream Frosting
If using cream cheese, beat it until smooth first. Add the cold heavy cream, powdered sugar, and vanilla extract. Whip on high speed until stiff peaks form. Spread the whipped cream frosting evenly over the chilled, soaked cake.
Step 5 — Add the Toppings
Scatter fresh blueberries generously over the top of the frosting. Add lemon zest curls or thin lemon slices for a beautiful, bright garnish. Drizzle with blueberry jam if desired. Keep refrigerated until ready to serve.
Tips & Tricks
- Poke while warm — a warm cake absorbs the soak much better than a cold one.
- Make it from scratch by replacing the box mix with your favorite homemade white cake recipe for an elevated version.
- Add a blueberry compote instead of fresh berries for a more intense blueberry flavor.
- Storage: Cover and refrigerate for up to 4 days. This cake is best served cold.
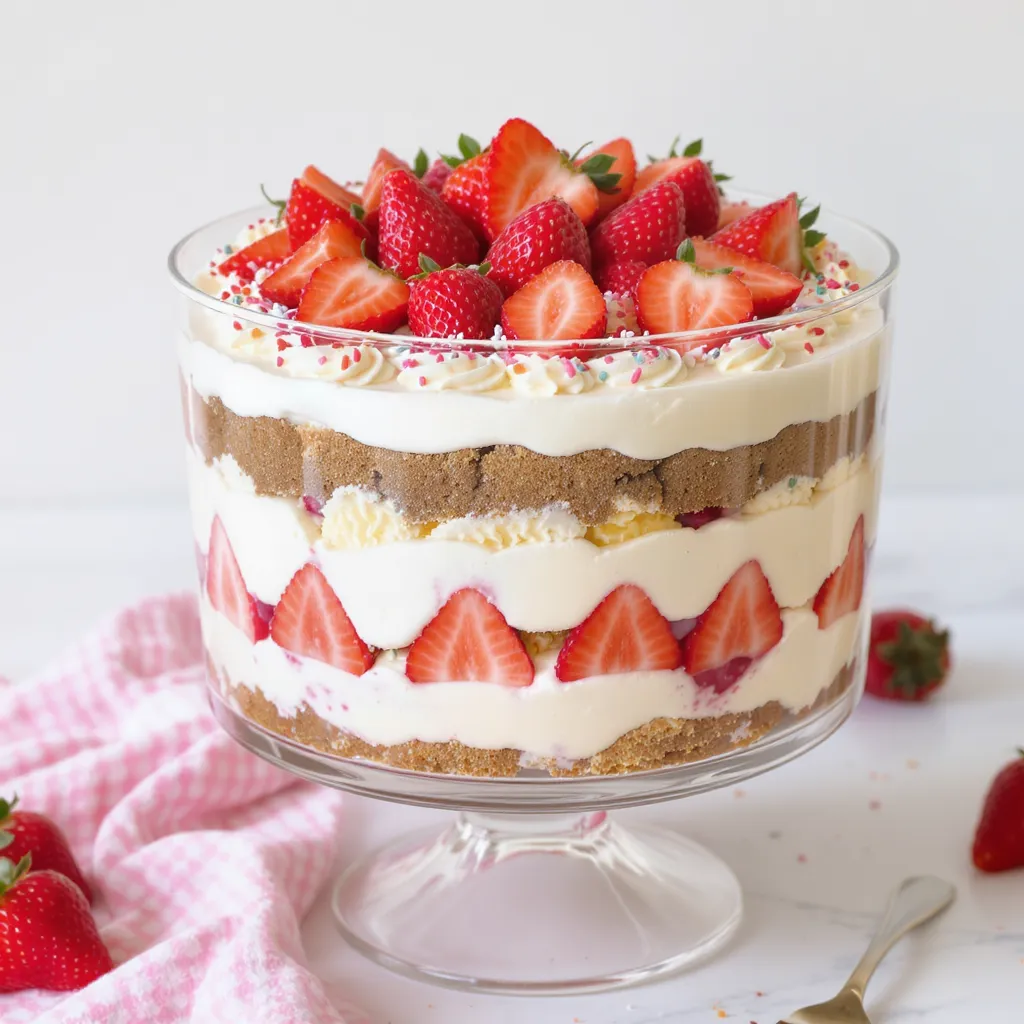
4. Strawberry Shortcake Trifle
Prep Time: 30 minutes | Chill Time: 2 hours | Servings: 10–12 | Difficulty: Easy
What is Strawberry Shortcake Trifle?
Strawberry Shortcake Trifle is a stunning layered dessert served in a large glass trifle bowl that showcases beautiful layers of fluffy whipped cream, sweet macerated strawberries, and soft chunks of buttery shortcake or pound cake. It is the ultimate showstopper dessert — impressive to look at, incredibly easy to make, and absolutely irresistible to eat. This no-bake-assembly dessert is perfect for summer parties, holidays, and any occasion where you want to impress without spending hours in the kitchen.
Ingredients
For the Macerated Strawberries:
- 4 cups fresh strawberries, hulled and sliced
- 3 tablespoons granulated sugar
- 1 tablespoon fresh lemon juice
- 1 teaspoon pure vanilla extract
For the Whipped Cream:
- 3 cups heavy whipping cream (cold)
- ½ cup powdered sugar
- 1½ teaspoons pure vanilla extract
- Optional: 4 oz cream cheese (softened) for a more stable, cheesecake-like cream
For the Cake Layer:
- 1 store-bought pound cake (16 oz) or homemade shortcake, cut into 1-inch cubes
- Alternatively: 1 package of ladyfinger cookies or angel food cake
For Garnish:
- Whole fresh strawberries
- Extra whipped cream rosettes
- Fresh mint sprigs
Instructions
Step 1 — Macerate the Strawberries
In a large bowl, combine the sliced strawberries with granulated sugar, fresh lemon juice, and vanilla extract. Toss gently until the strawberries are well coated. Let them sit at room temperature for 20–30 minutes, stirring occasionally. As they macerate, the strawberries will release their natural juices, creating a beautiful, sweet syrup that soaks into the cake layers.
Step 2 — Make the Whipped Cream
If adding cream cheese, beat it until smooth in a large bowl. Pour in the cold heavy cream, powdered sugar, and vanilla extract. Whip with an electric mixer on high speed until stiff peaks form. Be careful not to over-whip. If you want a firmer, more pipeable cream, the cream cheese addition is highly recommended.
Step 3 — Cube the Cake
Cut your pound cake or shortcake into roughly 1-inch cubes. If using angel food cake, tear it into rustic pieces for a lighter, airier texture.
Step 4 — Assemble the Trifle
Begin assembling in a large glass trifle bowl or a deep glass dish so the layers are visible. Start with a layer of cake cubes on the bottom. Spoon some of the macerated strawberries (with their juices) over the cake. Add a generous layer of whipped cream, spreading it to the edges of the bowl. Repeat these three layers — cake, strawberries, whipped cream — two to three times, depending on the depth of your bowl. Finish with a thick layer of whipped cream on top.
Step 5 — Garnish and Chill
Decorate the top with whole fresh strawberries, whipped cream rosettes piped with a star tip, and fresh mint sprigs for color. Cover the trifle loosely and refrigerate for at least 2 hours before serving to allow the layers to meld together beautifully.
Step 6 — Serve
Use a large serving spoon to scoop deep into the trifle so each serving gets all the layers — cake, strawberries, and cream in every spoonful.
Tips & Tricks
- Make it the night before for the best flavor — the cake absorbs the strawberry juices overnight and becomes incredibly moist.
- Use fresh, ripe strawberries for maximum flavor and the best-looking layers.
- Individual trifles can be assembled in mason jars or dessert glasses for a personal, party-ready presentation.
- Flavor variations: Add a layer of lemon curd, vanilla pudding, or a drizzle of strawberry jam between layers for extra depth.
- Storage: Cover and refrigerate for up to 2 days. Note that the longer it sits, the softer the cake layers become — which most people love!
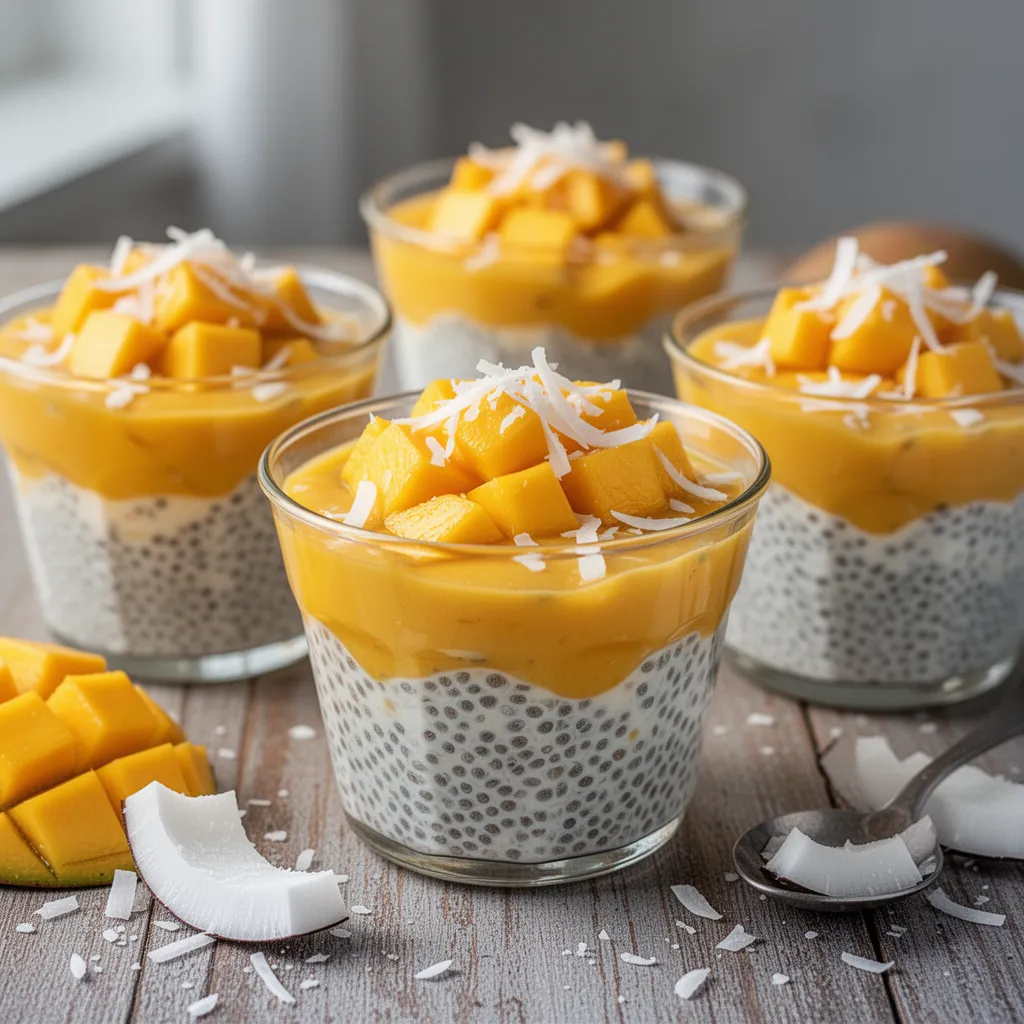
5. Mango Coconut Chia Pudding Cups
Prep Time: 10 minutes | Chill Time: 4–6 hours (or overnight) | Servings: 4 | Difficulty: Easy
Description
These Mango Coconut Chia Pudding Cups are the ultimate tropical dessert — creamy, dairy-free, and packed with nutrients. Made with velvety coconut milk and fresh mango, this no-cook recipe is perfect for meal prep, summer gatherings, or a healthy indulgent treat. Every spoonful delivers a burst of tropical sunshine!
Ingredients
For the Chia Pudding Layer:
- 1 cup full-fat coconut milk
- 1 cup unsweetened almond milk (or any plant-based milk)
- 4 tablespoons chia seeds
- 2 tablespoons maple syrup or honey
- 1 teaspoon pure vanilla extract
- A pinch of salt
For the Mango Layer:
- 2 large ripe mangoes, peeled and cubed
- 1 tablespoon fresh lime juice
- 1 teaspoon lime zest
- 1 tablespoon maple syrup (optional, adjust to taste)
For Topping:
- Fresh mango slices
- Toasted coconut flakes
- Fresh mint leaves
- A squeeze of lime juice
Instructions
Step 1 — Make the Chia Pudding Base
In a large mixing bowl, whisk together coconut milk, almond milk, maple syrup, vanilla extract, and a pinch of salt until well combined. Add the chia seeds and whisk again thoroughly to prevent clumping.
Step 2 — Let It Rest
Let the mixture sit for 10 minutes, then give it one more good stir to break up any chia seed clusters. Cover the bowl with plastic wrap and refrigerate for at least 4–6 hours, or overnight for best results.
Step 3 — Blend the Mango Layer
Add the mango cubes, lime juice, lime zest, and maple syrup to a blender. Blend until completely smooth and creamy. Taste and adjust sweetness as needed.
Step 4 — Assemble the Cups
Spoon a generous layer of chia pudding into clear serving glasses or cups. Pour the mango purée on top to create a beautiful two-tone effect.
Step 5 — Garnish & Serve
Top with fresh mango slices, toasted coconut flakes, and a sprig of mint. Serve chilled and enjoy!
Pro Tips
- Make it ahead: These cups stay fresh in the refrigerator for up to 3 days — perfect for meal prep.
- For extra creaminess: Use only full-fat coconut milk for both layers.
- Sweetness tip: If your mangoes are very ripe and sweet, skip the extra maple syrup entirely.
- Layer it beautifully: Use clear glasses so the gorgeous layers are visible — it looks stunning on the table!
Nutrition (Per Serving — Approximate)
Calories: 280 | Carbs: 32g | Fat: 14g | Protein: 5g | Fiber: 8g
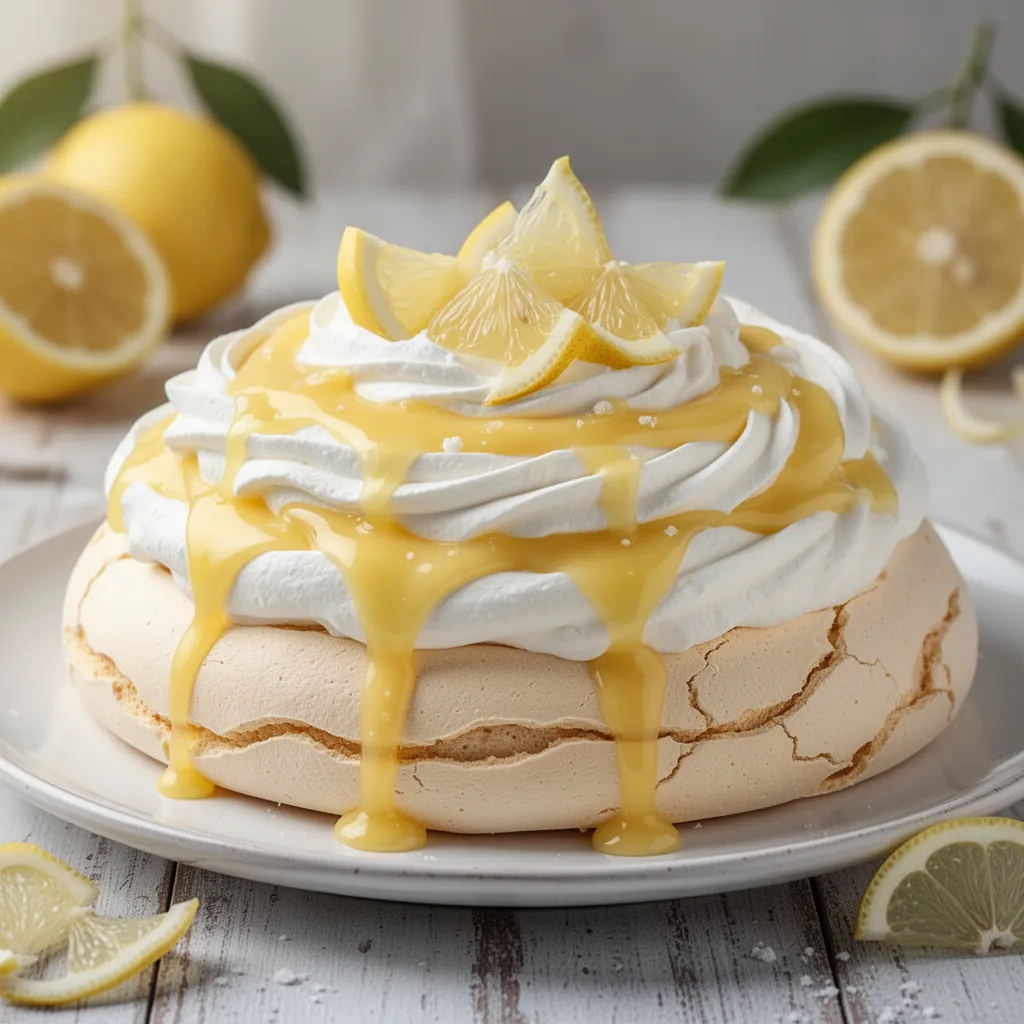
6. Lemon Curd Pavlova
Prep Time: 30 minutes | Bake Time: 1 hour 15 minutes | Cooling Time: 1–2 hours | Servings: 8–10 | Difficulty: Intermediate
Description
This Lemon Curd Pavlova is a showstopper dessert that combines a cloud-like crispy meringue shell with a soft, pillowy center, topped with silky homemade lemon curd and billowy whipped cream. It’s light yet indulgent, tangy yet sweet — a perfect centerpiece dessert for any celebration, dinner party, or spring gathering.
Ingredients
For the Meringue Base:
- 4 large egg whites, at room temperature
- 1 cup (200g) caster sugar (superfine sugar)
- 1 teaspoon white wine vinegar (or apple cider vinegar)
- 1 teaspoon cornstarch
- 1 teaspoon pure vanilla extract
For the Lemon Curd:
- 3 large eggs
- 2 egg yolks
- ¾ cup (150g) granulated sugar
- ½ cup (120ml) fresh lemon juice (about 4–5 lemons)
- 1 tablespoon lemon zest
- ½ cup (115g) unsalted butter, cubed
For the Whipped Cream Topping:
- 1½ cups (360ml) heavy whipping cream, cold
- 2 tablespoons powdered sugar
- 1 teaspoon vanilla extract
For Garnish:
- Fresh lemon slices or twists
- Edible flowers (optional)
- Powdered sugar for dusting
- Fresh berries (blueberries or raspberries work beautifully)
Instructions
Step 1 — Preheat & Prepare
Preheat your oven to 250°F (120°C). Line a large baking sheet with parchment paper. Draw a 9-inch circle on the parchment as a guide, then flip the paper over.
Step 2 — Make the Meringue
In a spotlessly clean, dry bowl, beat the egg whites with an electric mixer on medium speed until soft peaks form. Gradually add the caster sugar, one tablespoon at a time, while continuing to beat on high speed. Beat until stiff, glossy peaks form and the sugar is fully dissolved (test by rubbing a little between your fingers — it should feel smooth, not grainy). Gently fold in the vinegar, cornstarch, and vanilla.
Step 3 — Shape & Bake
Spoon the meringue onto the prepared baking sheet within the circle. Shape it into a round mound, creating a slight indentation in the center (this is where the toppings will sit). Bake for 1 hour and 15 minutes until the outside is crisp and lightly golden.
Step 4 — Cool the Meringue
Turn off the oven and leave the meringue inside with the door slightly ajar for 1–2 hours or until completely cool. Do NOT rush this step — sudden temperature changes can crack the meringue.
Step 5 — Make the Lemon Curd
Whisk together the eggs, egg yolks, sugar, lemon juice, and zest in a medium saucepan over medium-low heat. Stir constantly for about 8–10 minutes until the mixture thickens enough to coat the back of a spoon. Remove from heat and stir in the butter, one cube at a time, until melted and glossy. Pour into a bowl, press plastic wrap directly onto the surface, and refrigerate until fully chilled.
Step 6 — Make the Whipped Cream
Beat the cold heavy cream with powdered sugar and vanilla until soft, billowy peaks form. Don’t over-whip.
Step 7 — Assemble & Serve
Place the cooled meringue on a serving platter. Spoon a thick layer of whipped cream into the center, then drizzle generously with lemon curd. Garnish with lemon twists, fresh berries, edible flowers, and a dusting of powdered sugar. Slice and serve immediately.
Pro Tips
- Room temperature eggs: Cold egg whites won’t whip as well. Take them out 30 minutes before starting.
- Grease-free bowl: Even a trace of fat will prevent the meringue from whipping properly. Wipe your bowl with a little lemon juice before starting.
- Make ahead: Both the meringue base and lemon curd can be made a day in advance. Assemble just before serving.
- Humidity warning: Meringue does not like humidity — bake on a dry day for best results.
Nutrition (Per Serving — Approximate)
Calories: 320 | Carbs: 38g | Fat: 17g | Protein: 5g | Sugar: 35g
7. Carrot Cake Cheesecake

Prep Time: 40 minutes | Bake Time: 55–60 minutes | Chill Time: 4 hours | Servings: 12 | Difficulty: Intermediate
Description
Imagine your favorite classic carrot cake married with a rich, velvety New York-style cheesecake — that’s exactly what this Carrot Cake Cheesecake is. With a spiced carrot cake base, a luscious cream cheese filling swirled throughout, and a dreamy cream cheese frosting on top, this dessert is the ultimate fusion showpiece. It’s moist, indulgent, perfectly spiced, and absolutely irresistible.
Ingredients
For the Carrot Cake Layer:
- 1½ cups (190g) all-purpose flour
- 1 teaspoon baking powder
- ½ teaspoon baking soda
- 1½ teaspoons ground cinnamon
- ½ teaspoon ground nutmeg
- ¼ teaspoon ground ginger
- ¼ teaspoon salt
- 2 large eggs
- ¾ cup (150g) light brown sugar, packed
- ½ cup (120ml) vegetable oil
- 1 teaspoon pure vanilla extract
- 1½ cups (150g) finely grated fresh carrots (about 3 medium carrots)
- ½ cup (60g) chopped walnuts or pecans (optional)
For the Cheesecake Layer:
- 16 oz (450g) full-fat cream cheese, softened to room temperature
- ½ cup (100g) granulated sugar
- 2 large eggs
- 1 teaspoon pure vanilla extract
- ¼ cup (60ml) sour cream
- 1 tablespoon all-purpose flour
For the Cream Cheese Frosting:
- 8 oz (225g) cream cheese, softened
- 1½ cups (180g) powdered sugar, sifted
- ¼ cup (60ml) heavy cream
- 1 teaspoon vanilla extract
For Garnish:
- Chopped toasted walnuts
- Thin carrot curls or shavings
- A dusting of cinnamon
Instructions
Step 1 — Preheat & Prepare Your Pan
Preheat your oven to 325°F (163°C). Grease a 9-inch springform pan, line the bottom with parchment paper, and wrap the outside with two layers of aluminum foil (for the water bath).
Step 2 — Make the Carrot Cake Batter
In a bowl, whisk together flour, baking powder, baking soda, cinnamon, nutmeg, ginger, and salt. In a separate large bowl, whisk the eggs and brown sugar until combined, then whisk in the oil and vanilla. Fold the dry ingredients into the wet ingredients until just combined. Stir in the grated carrots and walnuts. Do not overmix.
Step 3 — Make the Cheesecake Batter
Beat the softened cream cheese and sugar with an electric mixer until smooth and fluffy, about 2–3 minutes. Add the eggs one at a time, beating on low after each addition. Mix in the vanilla, sour cream, and flour until just combined and silky smooth.
Step 4 — Layer the Batters
Pour about two-thirds of the carrot cake batter into the prepared springform pan and spread evenly. Carefully pour the cheesecake batter on top. Drop spoonfuls of the remaining carrot cake batter over the cheesecake layer and use a skewer or knife to gently swirl the two batters together for a marbled effect.
Step 5 — Bake in a Water Bath
Place the wrapped springform pan in a larger roasting pan. Pour hot water into the roasting pan until it reaches about 1 inch up the sides of the springform pan. Bake for 55–60 minutes, until the edges are set but the center still has a very slight jiggle.
Step 6 — Cool Properly
Turn off the oven and crack the door open. Let the cheesecake cool inside for 1 hour. Remove from the water bath, run a thin knife around the edge, and let it cool completely at room temperature. Then refrigerate for at least 4 hours or overnight.
Step 7 — Frost & Garnish
Beat together cream cheese, powdered sugar, heavy cream, and vanilla until smooth and fluffy. Spread generously over the top of the chilled cheesecake. Garnish with chopped toasted walnuts, carrot curls, and a light dusting of cinnamon.
Pro Tips
- Room temperature ingredients: Cold cream cheese will result in a lumpy batter. Always let it soften fully before mixing.
- Don’t skip the water bath: It ensures even, crack-free baking by keeping the oven environment moist.
- Grate your own carrots: Pre-shredded carrots are too dry — freshly grated carrots provide the best moisture.
- Storage: Store covered in the refrigerator for up to 5 days.
Nutrition (Per Serving — Approximate)
Calories: 480 | Carbs: 42g | Fat: 31g | Protein: 8g | Sugar: 30g
8. Raspberry Rose Panna Cotta
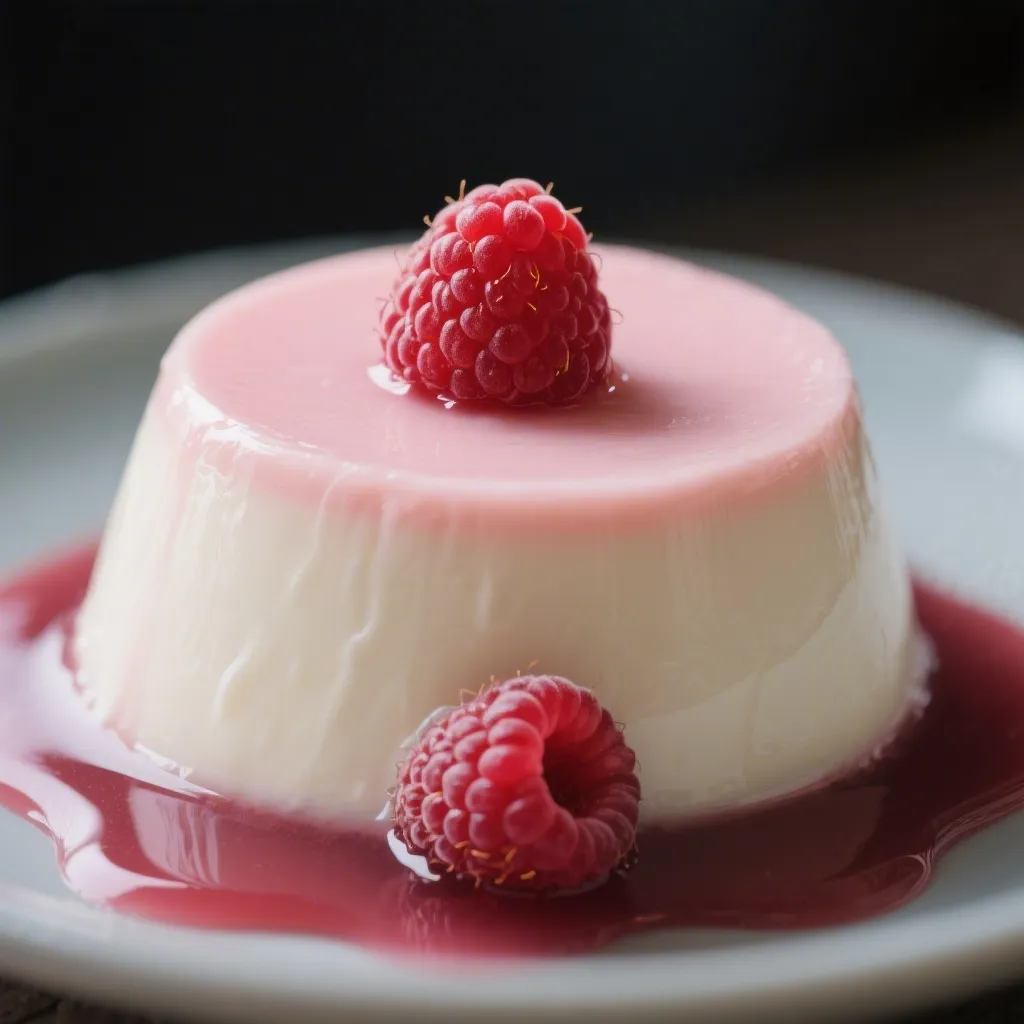
A Dreamy, Silky Dessert Infused with Floral Romance
Prep Time: 20 minutes | Chill Time: 4–6 hours | Total Time: ~6.5 hours | Servings: 6 | Difficulty: Easy
If you’re looking for a show-stopping dessert that’s as beautiful as it is delicious, this Raspberry Rose Panna Cotta is exactly what your table needs. With its creamy vanilla base, delicate rose essence, and a vibrant ruby raspberry coulis on top, every single spoonful feels like a bite of edible poetry. It’s elegant enough for a dinner party, yet simple enough to make on a quiet weekend afternoon.
What is Panna Cotta?
Panna Cotta is a classic Italian dessert whose name literally translates to “cooked cream.” It’s a silky, lightly sweetened gelatin-set cream that melts on your tongue. The beauty of panna cotta lies in its simplicity — just a handful of ingredients come together to create something that looks and tastes incredibly luxurious. This raspberry rose version takes that classic foundation and adds a romantic, floral twist that makes it truly unforgettable.
Why You’ll Love This Recipe
This Raspberry Rose Panna Cotta checks every box for the perfect dessert. It’s make-ahead friendly, which means you can prepare it the day before your event and simply plate it when guests arrive. The combination of rose water and fresh raspberries creates a flavor profile that’s floral, fruity, and perfectly balanced — never overwhelming or artificial. It’s also naturally gluten-free, making it a wonderful option for guests with dietary restrictions.
The jewel-toned raspberry coulis draped over the ivory cream creates a visual contrast that is simply stunning. Whether you serve it in elegant glasses or unmolded onto a plate, this dessert photographs beautifully and tastes even better than it looks.
Ingredients
For the Panna Cotta
- 2 cups (480ml) heavy whipping cream
- 1 cup (240ml) whole milk
- ⅓ cup (65g) granulated white sugar
- 2½ teaspoons (about 1 packet / 7g) unflavored gelatin powder
- 3 tablespoons cold water (to bloom the gelatin)
- 1½ teaspoons pure rose water (food-grade)
- 1 teaspoon pure vanilla extract
- A small pinch of fine sea salt
For the Raspberry Coulis
- 2 cups (250g) fresh raspberries (or frozen, thawed)
- 3 tablespoons granulated sugar (adjust to taste)
- 1 tablespoon fresh lemon juice
- 1 teaspoon rose water (optional but recommended)
For Garnish
- Fresh raspberries
- Edible dried rose petals
- A light dusting of powdered sugar (optional)
- Fresh mint leaves (optional)
Equipment You’ll Need
- 6 individual ramekins, glasses, or silicone molds
- A small saucepan
- A fine mesh strainer or sieve
- A whisk
- A ladle or measuring cup for pouring
- A blender or immersion blender (for the coulis)
Step-by-Step Instructions
Step 1 — Bloom the Gelatin
Pour the 3 tablespoons of cold water into a small bowl. Sprinkle the gelatin powder evenly over the surface. Do not stir. Let it sit undisturbed for about 5–7 minutes until it becomes spongy and fully absorbed. This process is called “blooming” and it ensures your gelatin dissolves smoothly without any lumps.
Step 2 — Warm the Cream Mixture
In a medium saucepan over medium-low heat, combine the heavy cream, whole milk, sugar, and a pinch of salt. Stir gently and heat the mixture until the sugar has fully dissolved and the liquid is steaming hot — but do not let it boil. Boiling can affect the texture of your panna cotta and reduce the delicate floral notes you’re building.
Step 3 — Dissolve the Gelatin
Remove the saucepan from the heat. Add the bloomed gelatin to the hot cream mixture and whisk gently until it is completely dissolved. You should see no granules or lumps remaining. This usually takes about 1–2 minutes of gentle stirring.
Step 4 — Add the Flavor
Stir in the rose water and vanilla extract. Give the mixture a gentle stir and take a small taste — you’re looking for a soft, floral background note that isn’t overpowering. Rose water is potent, so it’s best to start with the recommended amount and add more only if desired.
Step 5 — Pour and Chill
Lightly grease your ramekins or molds with a very thin layer of neutral oil (like sunflower or grapeseed oil) if you plan to unmold them later. If serving in glasses, skip this step. Using a ladle, pour the cream mixture evenly into your 6 serving vessels. Let them cool at room temperature for about 20 minutes, then cover each one with plastic wrap and transfer them to the refrigerator. Chill for a minimum of 4 hours, though overnight is ideal for the firmest, cleanest texture.
Step 6 — Make the Raspberry Coulis
While the panna cotta sets, prepare your coulis. Combine the raspberries, sugar, and lemon juice in a small saucepan over medium heat. Cook for about 8–10 minutes, stirring occasionally, until the raspberries have broken down completely and the sauce has thickened slightly. Remove from heat, stir in the rose water if using, and allow it to cool for a few minutes. Pour the mixture through a fine mesh strainer into a clean bowl, pressing with the back of a spoon to extract all the juice. Discard the seeds. Cover and refrigerate until ready to use.
Step 7 — Serve and Garnish
When you’re ready to serve, take the panna cotta out of the refrigerator. If serving in glasses, simply spoon 2–3 tablespoons of the chilled raspberry coulis over the top of each one. If unmolding, run a thin knife around the edge of each ramekin, place a plate on top, and invert with a gentle shake. Then spoon the coulis generously around and over the top.
Finish with fresh raspberries, dried rose petals, and any other garnishes you love. Serve immediately.
Pro Tips for Perfect Panna Cotta
Don’t overheat the cream. Bringing your cream mixture to a full boil can cause it to set unevenly and may also dull the floral flavors. Steaming hot — not boiling — is the sweet spot.
Measure your rose water carefully. Rose water is beautifully fragrant but it can quickly go from subtle and romantic to soapy if you use too much. Stick to the recipe amount on your first try.
Bloom your gelatin properly. Skipping or rushing the blooming step is the most common cause of lumpy or unevenly set panna cotta. Always bloom in cold water and give it the full 5–7 minutes.
Chill overnight for best results. While 4 hours is the minimum, an overnight chill gives you a firmer, creamier texture that unmolds cleanly and has a more developed flavor.
Strain your coulis well. Raspberry seeds can be quite gritty. Running the coulis through a fine mesh strainer gives you a glossy, professional-looking sauce.
Variations & Substitutions
Make it dairy-free: Substitute the heavy cream and whole milk with full-fat coconut cream and coconut milk. The result will have a subtle coconut flavor that actually pairs beautifully with rose and raspberry.
Make it vegan: Use the dairy-free substitutions above and replace gelatin with agar-agar powder. Use approximately ¾ teaspoon of agar-agar per cup of liquid, as it sets firmer than gelatin.
Strawberry Rose version: Swap the raspberry coulis for a strawberry coulis using the exact same method. The sweeter strawberry flavor creates a slightly gentler contrast with the rose cream.
Add a hibiscus layer: For an extra visual wow factor, make a thin hibiscus jelly layer (hibiscus tea, sugar, and gelatin) and pour it over the set panna cotta before adding the raspberry coulis.
Make-Ahead & Storage Tips
Panna cotta is one of the best make-ahead desserts you can have in your repertoire. Once set, the panna cotta will keep in the refrigerator for up to 3 days, covered with plastic wrap. The raspberry coulis can also be stored in an airtight jar in the refrigerator for up to 5 days. It’s best to keep them separate and only add the coulis and garnishes right before serving, so everything looks fresh and vibrant.
Serving Suggestions
This dessert shines brightest as the finale to a spring or summer dinner party menu. It pairs wonderfully after a light pasta dish or a fresh green salad. For a full romantic-themed menu, consider serving it alongside a glass of Prosecco or a light rosé wine. The bubbles and mild sweetness of the wine complement the floral creaminess of the panna cotta perfectly.
Nutritional Information (Per Serving — Approximate)
| Nutrient | Amount |
|---|---|
| Calories | ~310 kcal |
| Total Fat | 24g |
| Saturated Fat | 15g |
| Carbohydrates | 22g |
| Sugar | 19g |
| Protein | 4g |
| Fiber | 2g |
Nutritional values are estimates and may vary based on specific ingredients used.
Frequently Asked Questions
Can I use rose syrup instead of rose water?
Yes, but reduce the sugar in the panna cotta slightly, as rose syrup is already sweetened. Start with 1 tablespoon of rose syrup and adjust to your taste.
My panna cotta didn’t set — what went wrong?
This is usually caused by gelatin that wasn’t properly bloomed or fully dissolved. Make sure the cream is hot enough when you add the gelatin, and whisk until no granules remain.
Can I make this in a large mold instead of individual ones?
Absolutely. Pour the mixture into a lightly oiled bundt pan or loaf pan and chill until set. Unmold onto a serving platter and pour the coulis over the center or around the base.
Is rose water the same as rose extract?
No — they are different in concentration. Rose extract is much more intense. If using rose extract, start with just ¼ teaspoon and adjust from there.
This Raspberry Rose Panna Cotta is the kind of recipe that becomes a signature dish — the one your guests will always remember and always ask for again. Once you make it, you’ll understand why. It’s pure, simple elegance in a glass.


